Navigating DLMM pools
Meteora’s DLMM, or Dynamic Liquidity Market Maker, is a dynamic liquidity protocol designed to boost fee earnings for liquidity providers on Solana. Unlike AMM DEXes, where token liquidity is allocated inefficiently across an infinite price range, on DLMM, you have the freedom to adjust your price range, concentrating liquidity where it matters most. On the Pool List page, once you’ve selected the token pair and DLMM pool you’d like to add liquidity into, click on it and you would enter the specific pool’s detail page.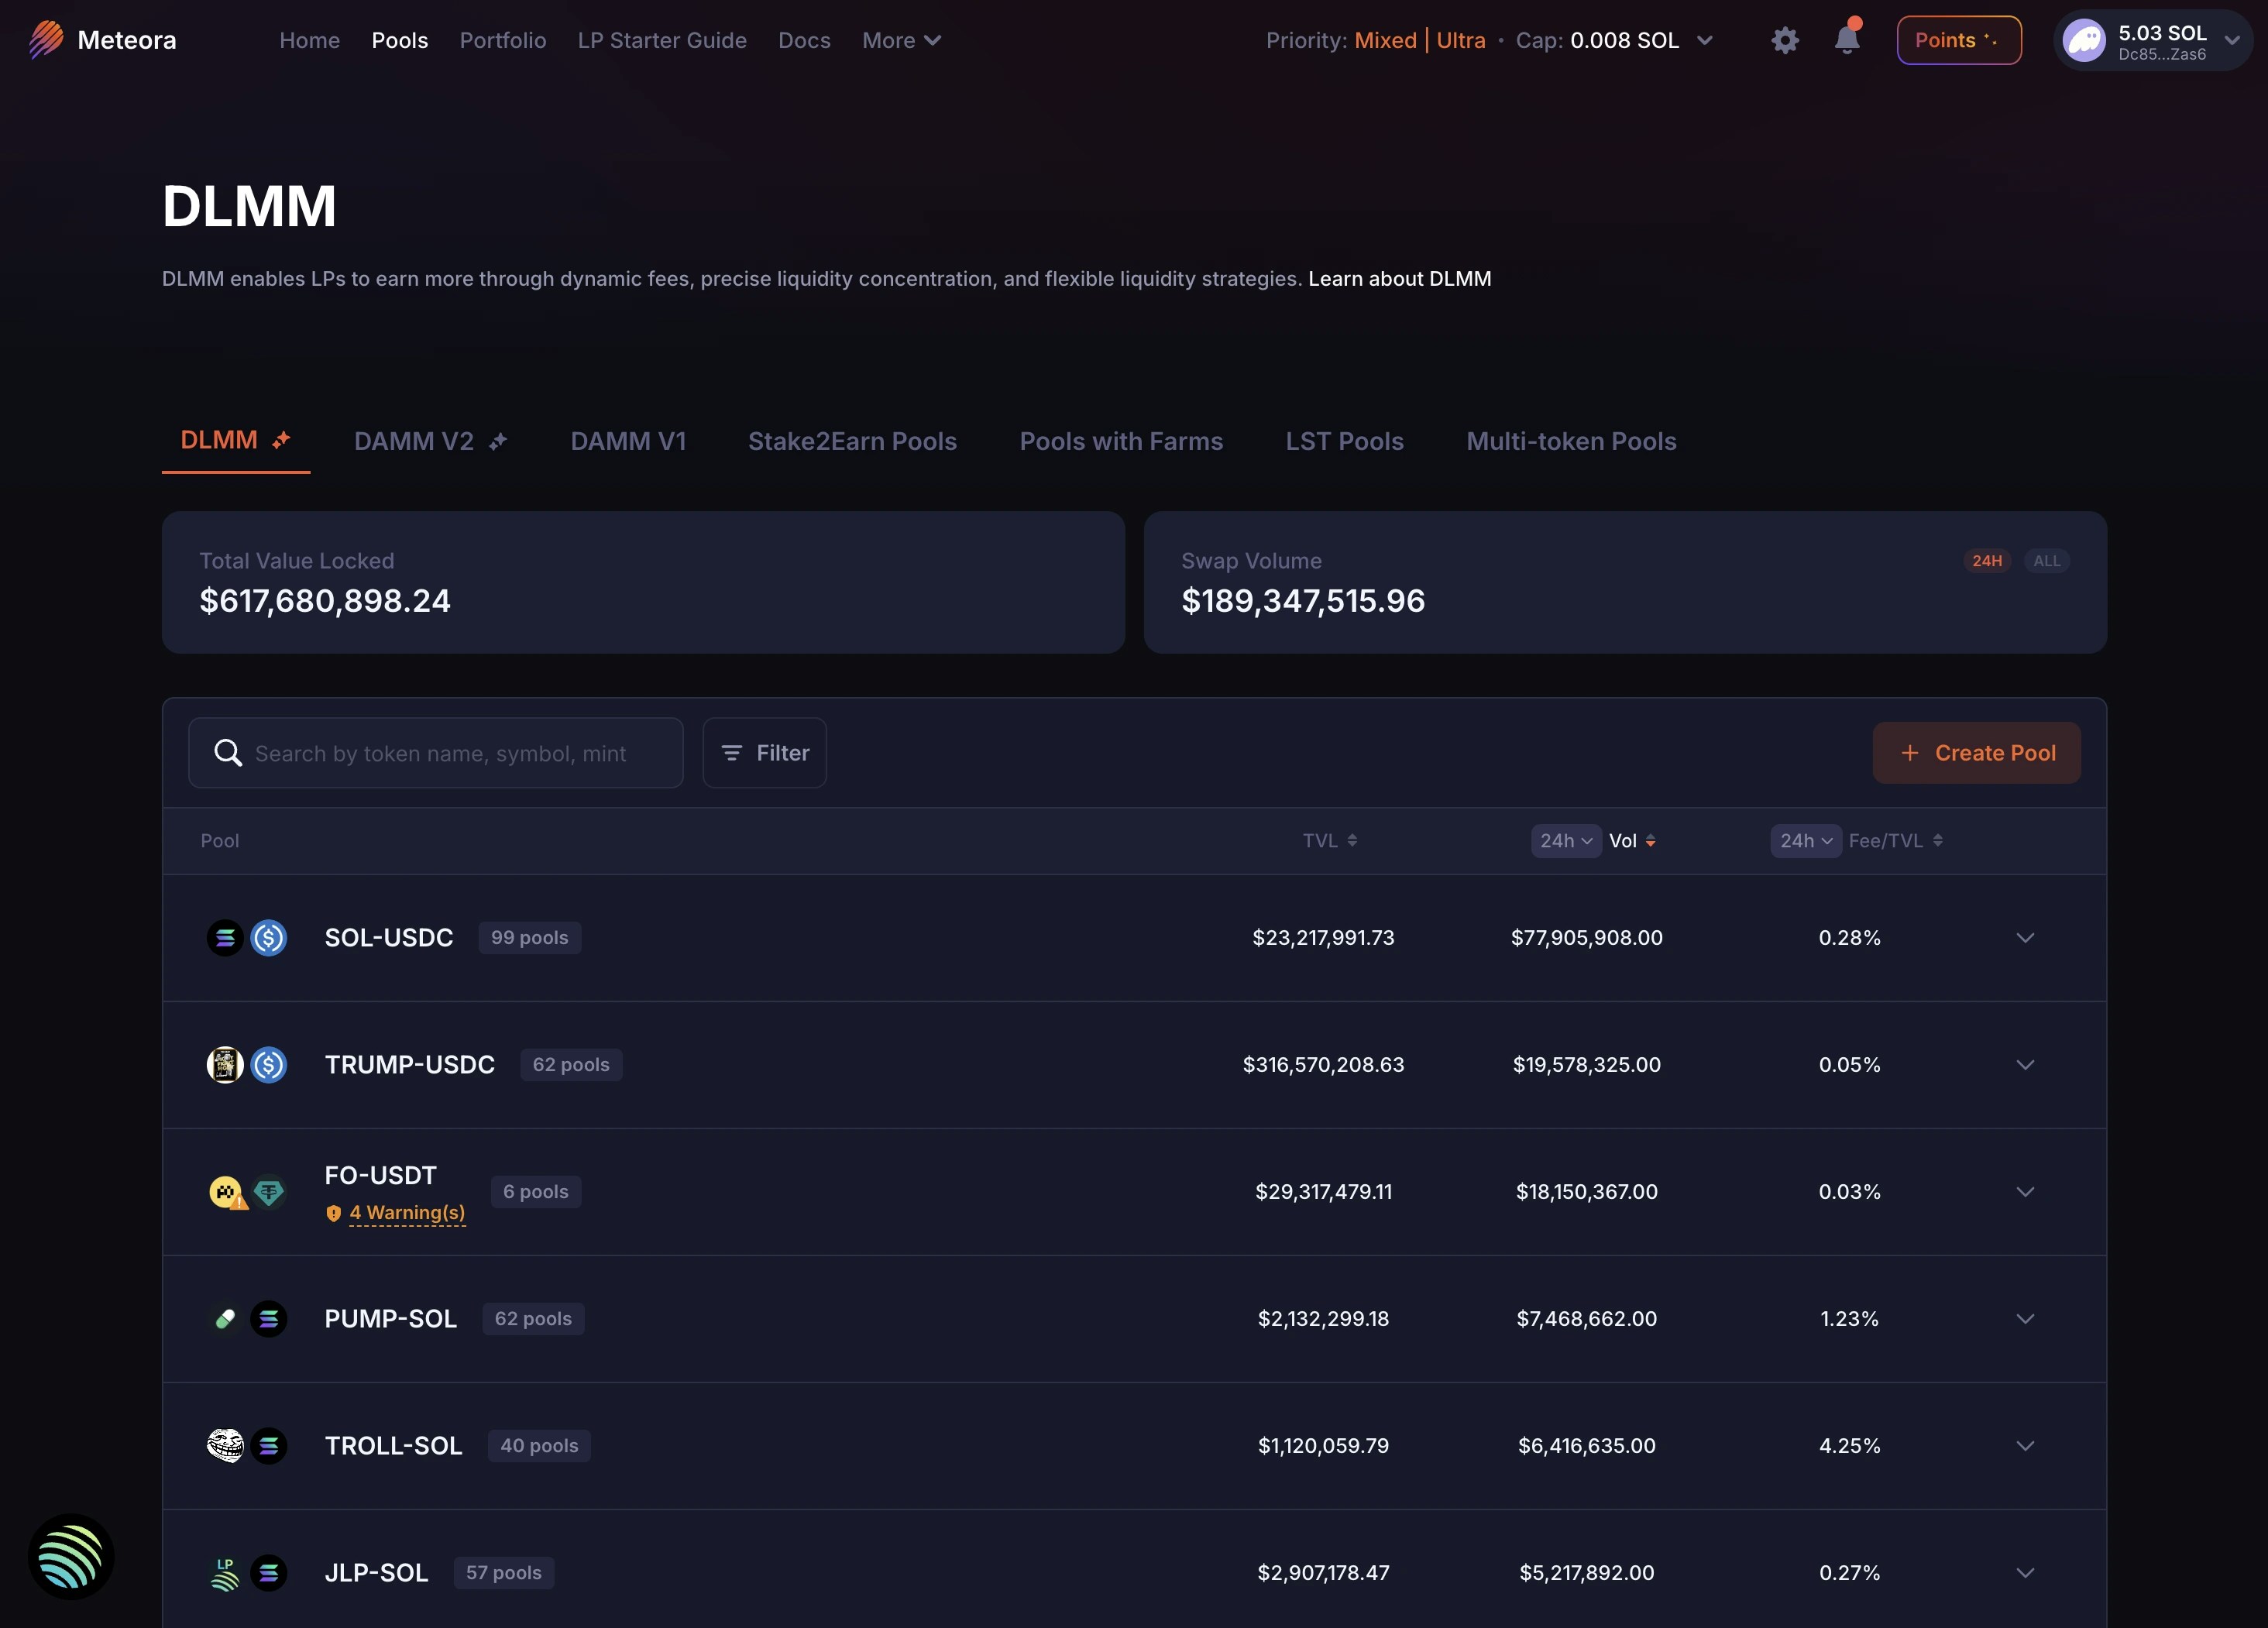
Total Value Locked (TVL)
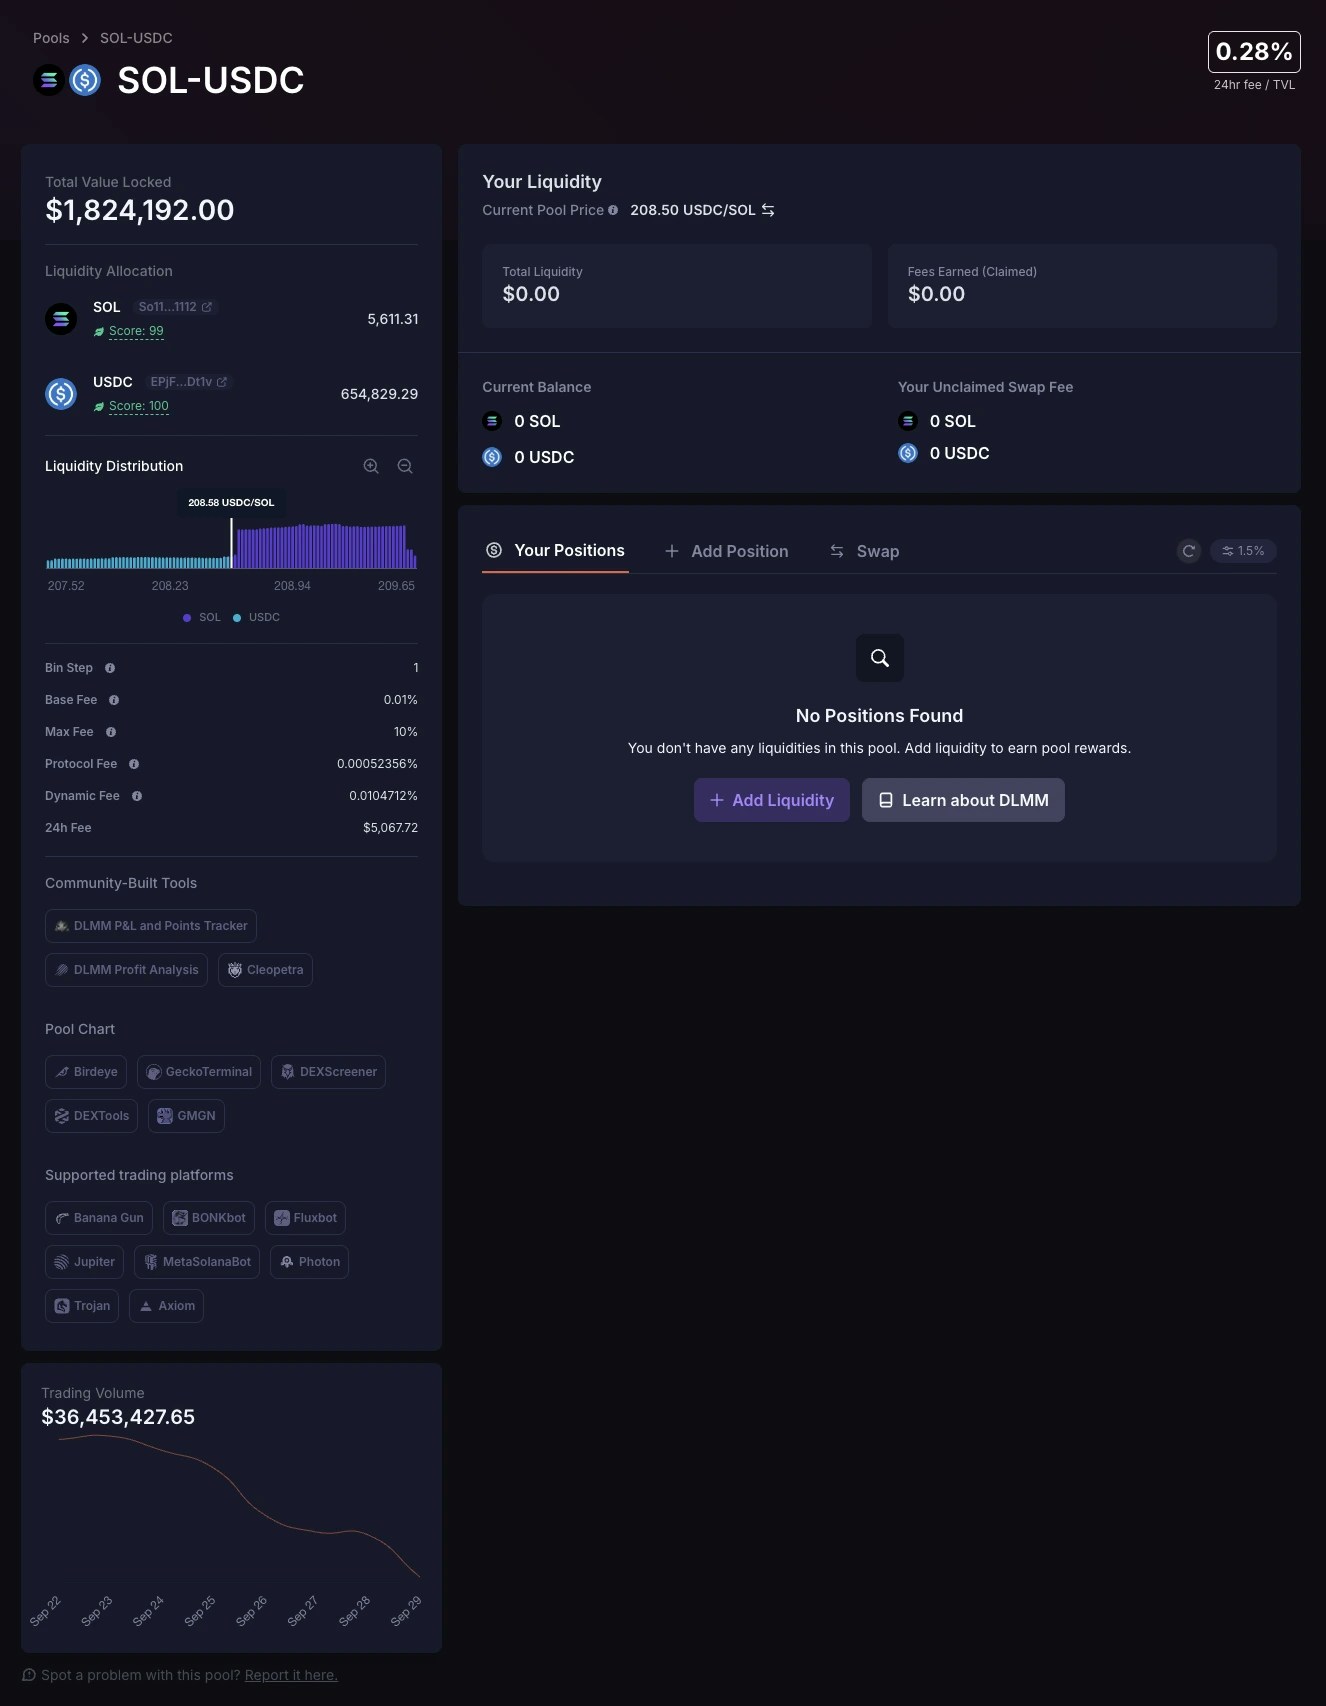
At the top left of the pool detail page, you can view the pool’s TVL (Total Value Locked). This is the total amount of token assets in the pool in terms of $USD value (how much all the tokens currently in the pool are worth).
Liquidity allocation
The TVL is further broken down into the amount of each token in the pool. In this screenshot example, $1,632,497 in TVL is actually made up of 5,702.33 SOL and 649,914.70 USDC. In the Liquidity Allocation section, you can view a snippet of the token’s contract address. Click the icon next to it to access important quicklinks; to copy the token’s contract address, view the contract address on Solscan, check for token risks on Rugcheck.xyz, or analyze the token behaviour on Bubblemaps.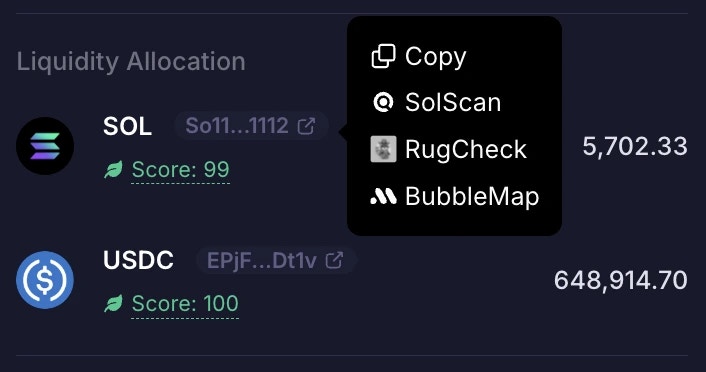
Liquidity Distribution
Here you can quickly take a quick look at the pool’s liquidity distribution chart to have a better understanding on where and how liquidity is currently distributed in the pool so that you can make more informed decisions when LPing. You’re able to click the magnifying glass icon to zoom in or zoom out if required.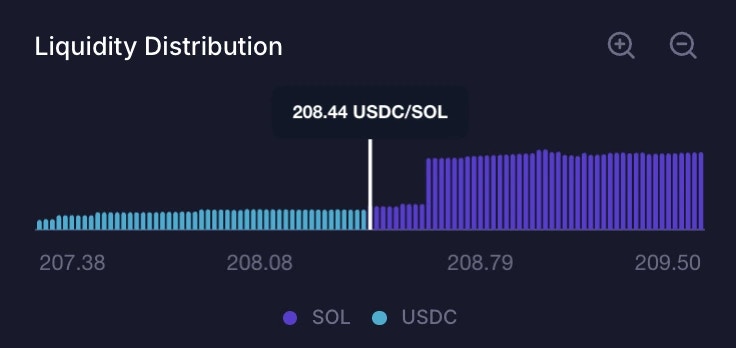
Pool Details
Bin Steps
Each bin represents a single price point, and the difference between 2 consecutive bins is the bin step. Similar to tick size, a higher bin step means a larger jump from one price to the next.- Smaller bin step: Allows you to capture more volume, but your max range per position is smaller, with more limited base fee options. Generally, use smaller steps for more stable pairs and larger steps for more volatile pairs.
- Larger bin step: Allows you to set a higher base fee and a wider price range per position, but at the cost of less volume, since there’s a less continuous price range (harder for liquidity to be picked up for swaps). But useful for highly volatile pairs where price swings can be huge.
Base Fee
Minimum trading fees earned when swaps occur through the liquidity positionMax Fee
Maximum trading fees earned when swaps occur through the liquidity positionProtocol Fee
Amount of fees charged on each trade which goes to the protocol or integrations. For standard DLMM pools, Protocol Fee is typically 5% of the Dynamic Fee.Dynamic Fee
LPs can earn more with Dynamic Fees, which surge in response to real-time price volatility. For DLMM, Dynamic Fee includes the Base Fee.24h Fee
Total Fees collected by the pool in 24h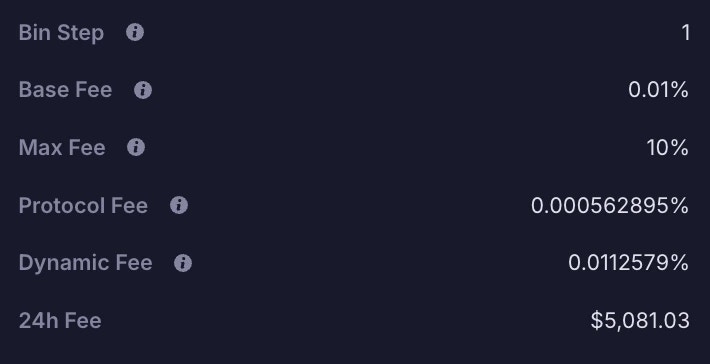
Community-Built Tools
Meteora’s LP Army comprises many talented developers, who have over time built useful tools to improve LPing for everyone. The full list of tools can be found here.
Pool Chart
Popular data analytics and charting tools with more granular data have integrated Meteora’s liquidity pools, including Birdeye, GeckoTerminal, DEXScreener, DEXTools, GMGN. We’ve provided buttons that link to the specific pool page for each of these tools.
Supported Trading Platforms
Popular trading platforms and bots have also integrated Meteora’s liquidity pools, including Axiom, Banana Gun, BONKbot, Fluxbot, Jupiter, MetaSolanaBot, Photon, and Trojan. We’ve provided buttons that link specifically to each of the trading platforms. Note: For pools without SOL as the quote token, BONKbot, Photon, and Axiom won’t be in the list.
Pool Trading Volume
At the bottom left of the pool detail page, you can view the trading volume of the pool from the last 7 days.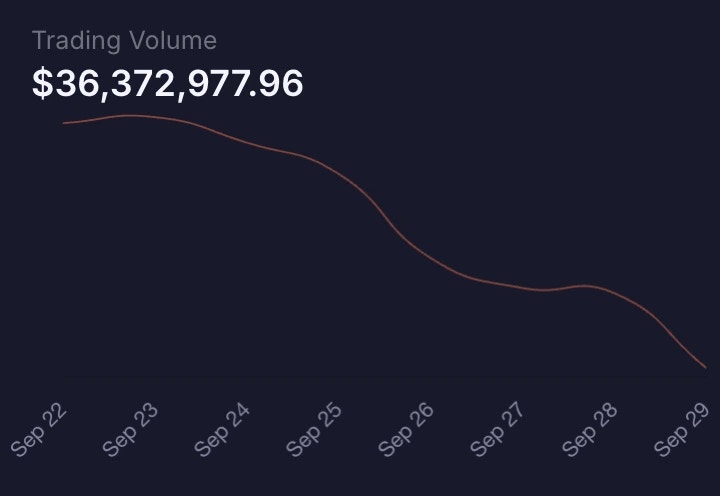
24h Fee / TVL %
At the top-right corner of the pool detail page, you’ll find the 24h fee-to-TVL ratio — calculated by dividing the fees collected over the past 24 hours by the current TVL, and expressed as a percentage.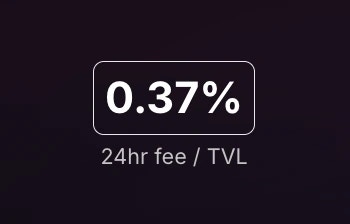
Current Pool Price
You can view the Current Pool Price in this section. The Current Pool Price may not always be close to the general market price. Sometimes, the initial price in the DLMM pool may not be in sync with the general market price, especially when it was just created with a wrong initial price and has low liquidity.
As a reference for market price for the token, Meteora uses Jupiter’s price API. However, this is just an estimate. Before adding liquidity, LPs should always check and compare the Meteora pool price with all other markets (e.g. other DEX pools) that have liquidity for the token to have a better sense of the general market price.
What can Liquidity Providers do if the pool price is not in sync with the market price?
LPs can first use the “Sync with Jupiter’s price” button to sync the pool price with Jupiter price before adding liquidity, to avoid the risk of loss due to arbitrage trades.
- With 0 liquidity between the active bin and the Jupiter price bin, or
- With liquidity in a bin that’s close enough to the Jupiter price bin.
Your Liquidity
In the “Your Liquidity” section, you would be able to view the important details related to the tokens you have already deposited in the pool, and the fees you’ve earned as a liquidity provider.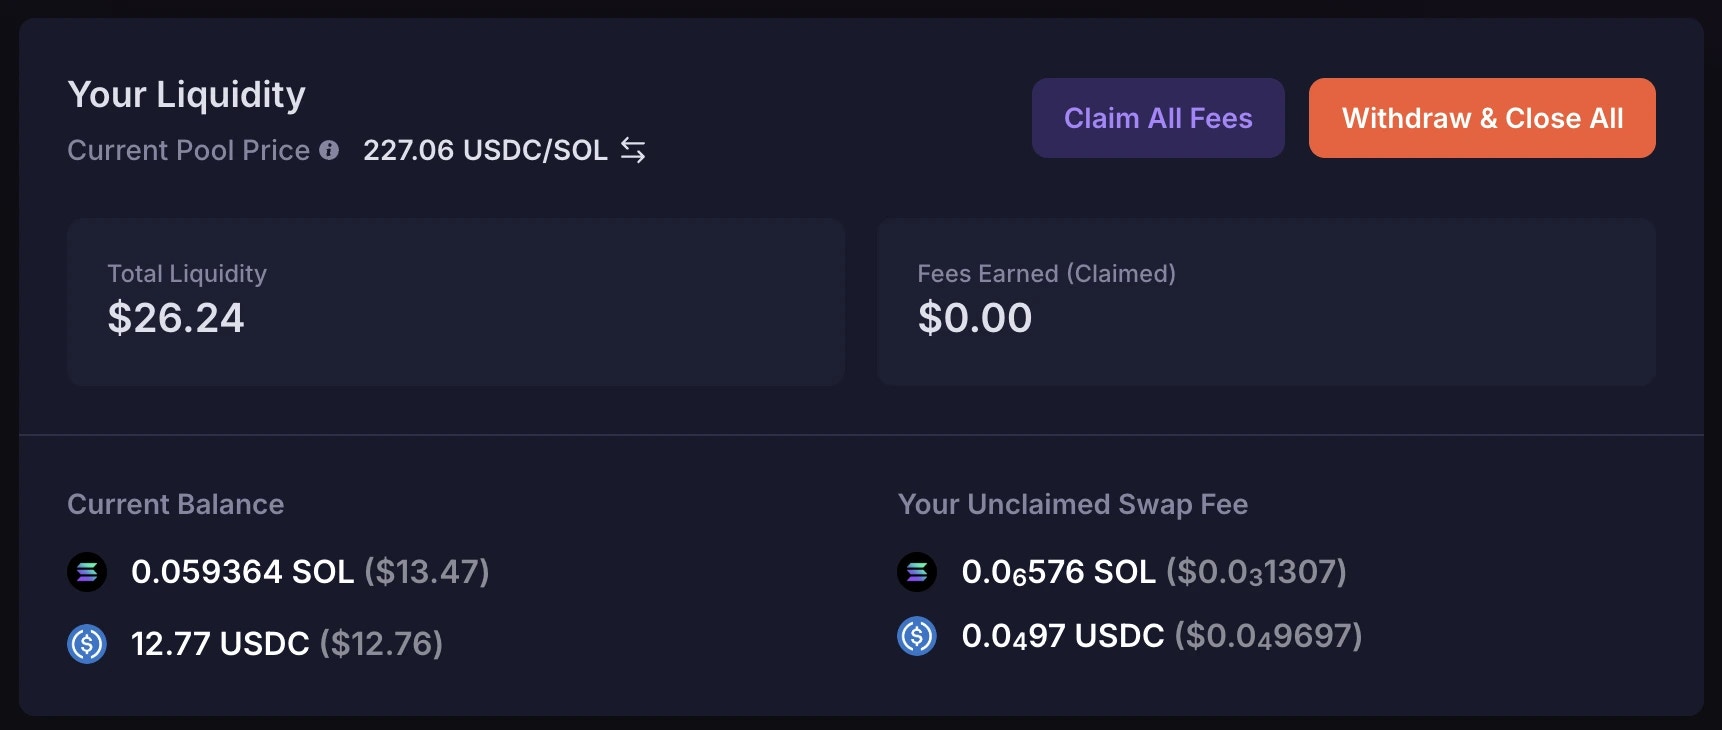
Total Liquidity
This shows your total liquidity currently deposited in the pool. You are able to click on the number to toggle (switch) between USD or SOL value.Fees Earned (Claimed)
On DLMM, fees do not auto-compound back to the pool. Fees you earn accumulate and you’d have to claim them manually. “Fees Earned (Claimed)” shows your total fees claimed from being a liquidity provider in the pool. The amount gets updated each time you claim fees from your position. You are able to click on the number to toggle (switch) between USD or SOL value. The tooltip also shows the exact amount of each token in the pair that you have claimed as fees.Your Current balances
This shows the current tokens you have deposited as liquidity in the pool. The amount stated in your current balance may change over time when your liquidity position is active and trades occur through your position.Your Unclaimed Swap Fee
This shows the current swap fees that you have accumulated but have not claimed. The amount stated in “Your Unclaimed Swap Fee” increases whenever you earn swap fees, and becomes 0 when you claim all your fees. The amount stated excludes the swap fees that you have already claimed previously.How to Add Liquidity
Under the “Your Positions” tab, if you have no existing positions, you can click the “+ Add Liquidity” button, which will bring you to the “Add Position” tab. You can then begin adding liquidity.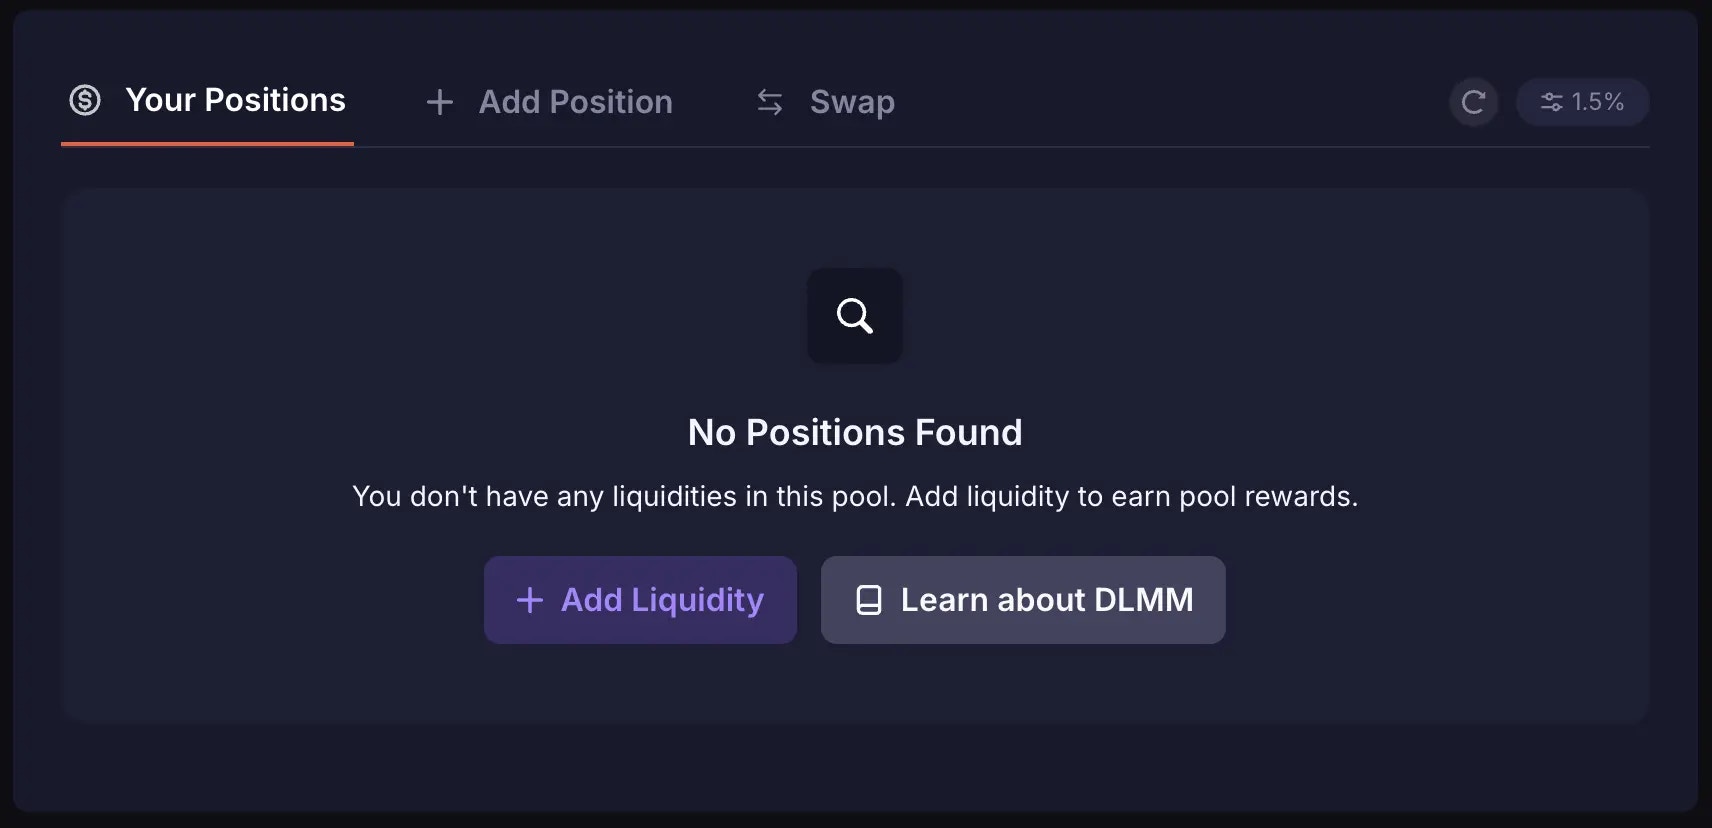
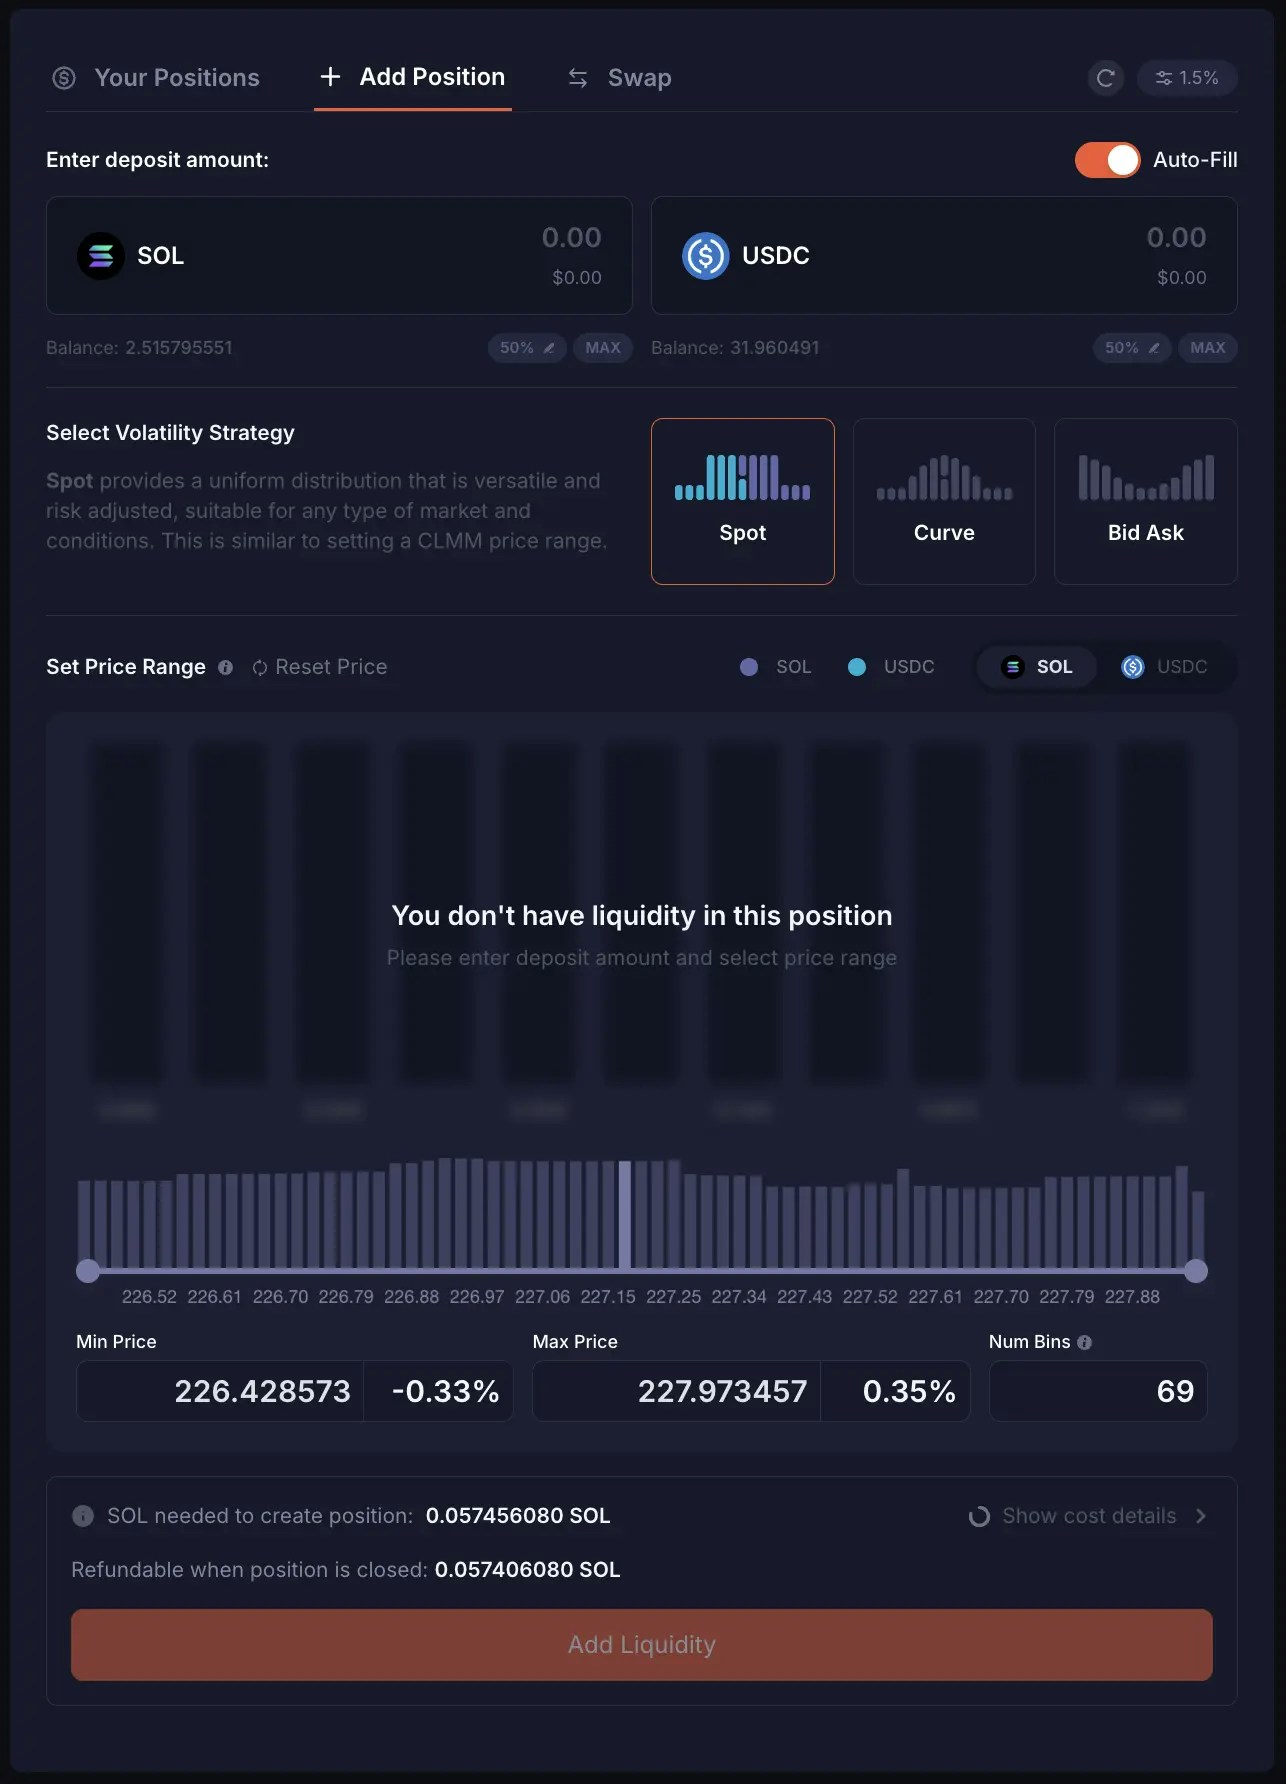
Enter Deposit Amount
First of all, under “Enter deposit amount”, you can enter the amount of Base Token or Quote Token you’d like to deposit into the pool. The corresponding $USD value will be shown at the bottom of your input. Since the “Auto-Fill” toggle is enabled by default, when you enter an amount for either the Base or Quote Token, Meteora automatically fills in the approximate equivalent amount of the other token based on the current exchange rate. For example, if 1 SOL = 250 USDC, when you enter 2 SOL, the USDC input field will automatically state approximately ~500 USDC. The amount used may differ slightly from the expected exchange rate because the token ratio within the active price bin is constantly changing as swaps occur.
Setting Liquidity Slippage
Here you can adjust how much change to the pool price you’re willing to accept and still add liquidity. If the pool price changes a lot while adding liquidity, your transaction may fail. Increase this slippage to improve your success rate.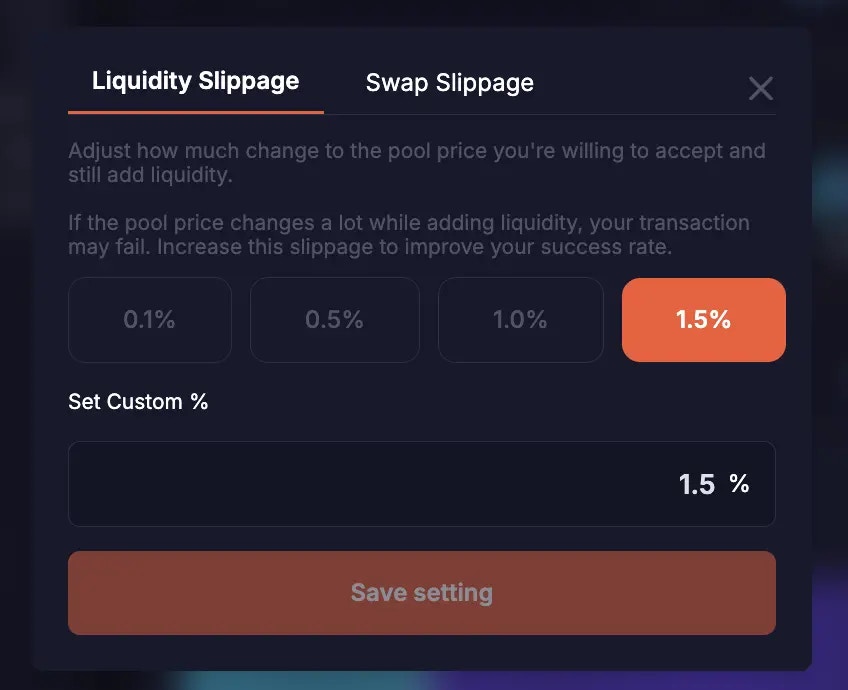
Which Volatility Strategy to use?
The Volatility Strategy represents how your liquidity gets allocated in the pool. If you change your Volatility Strategy, the shape of your liquidity distribution in the chart would also change.
Set the Price Range
When you have entered your preferred deposit amount, you will see a visual representation of where your liquidity will be allocated in the pool. By default, when you are adding liquidity for two tokens, your liquidity spans 69 bins, and gets allocated at a price range where the active price bin is positioned roughly at the center of your price range.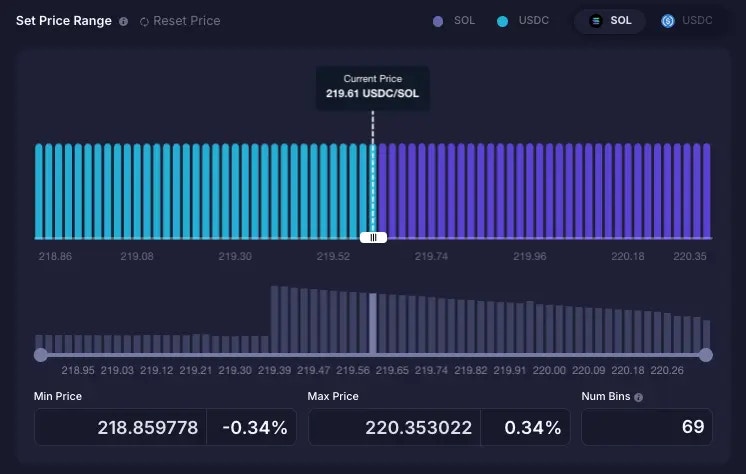
Coloured bins
Purple bins represent the Base token, while the cyan blue bins represent the Quote token. In this example, SOL the Base token is represented by the purple bins, while USDC the Quote token is represented by the cyan blue bins. And the height of each bin (y axis) represents the total value of the tokens in the particular bin, in terms of the quote token in the bin. In other words, the height represents the total quote value for the bin.Grey bins
The grey bins below the liquidity chart with the purple and cyan blue bins represent the existing liquidity already deposited in the pool. And the height of each grey bin represents the relative amount of liquidity in that bin compared to the other bins. If you hover over them you can see a more granular breakdown of the liquidity stats for each bin (e.g. the bin price, and amount of tokens currently in the bin).Adjusting your Price Range
You are able to set the price range for your liquidity position before you execute your deposit. The wider the price range, the higher the number of price bins used for your position. You have 3 methods to adjust your price range to allocate your liquidity in the pool:- You can drag and adjust the two end points of the slider to make your price range narrower. However, adjusting the slider does not allow you to go beyond 69 bins for your price range.
- By the default, the UI will set a price range for you that consists of 69 bins. For a wider or narrower price range, you can input a new Min price or Max price in the Min and Max price fields. You are able to widen your position up to a maximum of 1,400 bins.
- You can also widen or narrow your price range by setting new Min % and Max % values. Each value indicates how far, in percentage terms, your min/max price bin is from the current active bin.
Concentrated Liquidity
- The narrower the price range you set, the more concentrated your liquidity is. Conversely, the wider your price range, the less concentrated your liquidity is.
- And the more concentrated your liquidity, the more capital efficient it is, and the more volume (and fees) you are able to generate from traders with your liquidity.
- However, the trade-off is that with more liquidity concentration, there’s a higher chance the active pool price goes out of your price range. When that happens, your position becomes inactive and you stop earning swap fees.
Depositing Single-sided Liquidity (Depositing only one token)
In certain scenarios, LPs may not want to add liquidity with both tokens (dual-sided). Instead, they may want to add liquidity with only one token (single-sided). In order to add liquidity single-sided, you have to first toggle off the “Auto-Fill” feature. This lets you manually enter an amount for either the Base or Quote token without automatically populating the other field.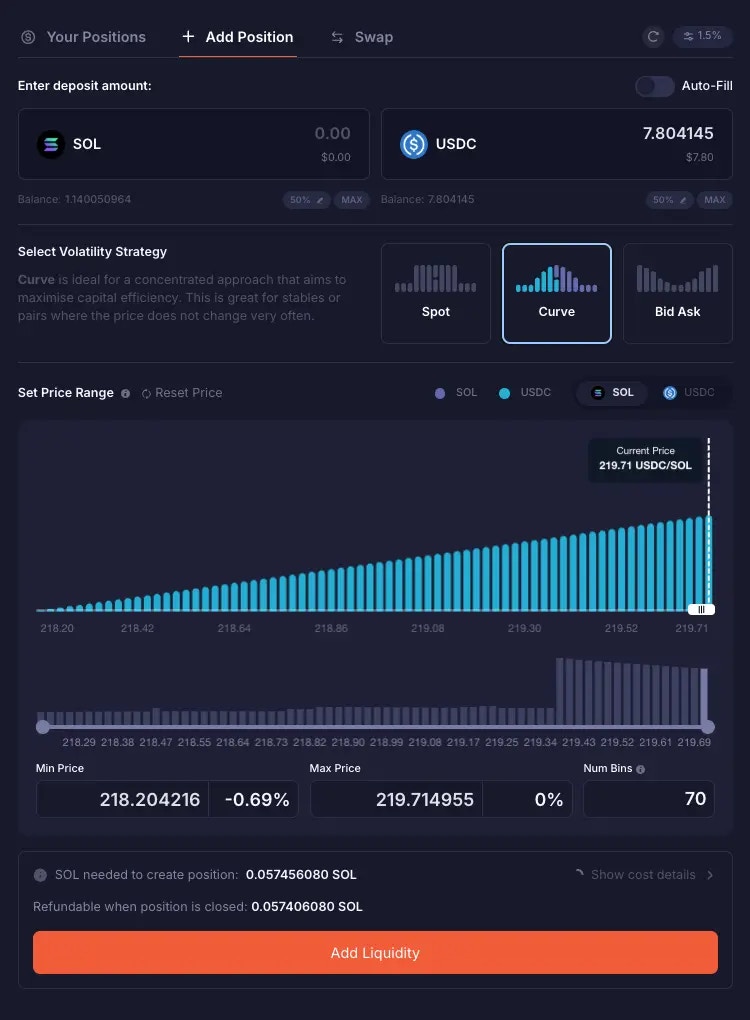
Example scenario to use single-sided liquidity:
You just bought some SOL at 236.6 USDC per SOL, and you want to gradually swap it for USDC at a profit until it reaches 280 USDC per SOL. You can turn off “Auto-Fill”, enter only the amount of SOL you just bought, and set a price range from 240 to 280 USDC per SOL. You also used the Bid Ask Volatility Strategy. By creating this liquidity position, your SOL gets allocated between 240 to 280 USDC per SOL, and because Bid Ask Volatility Strategy was used, more of your SOL is allocated towards the max price of your range. Whenever SOL price goes into the 240-280 USDC per SOL range, your liquidity position becomes in range and active, and it would start being swapped for USDC. Whenever SOL is swapped for USDC in your position, there will be some cyan blue bins (representing USDC) appearing in the liquidity chart. When the price reaches 280 USDC per SOL, which is the max price of your range, all your SOL would have been swapped for USDC. In the liquidity chart, you will see that all the purple bins (representing SOL) would have turned into cyan blue bins (representing USDC).Cost Details for your Deposit
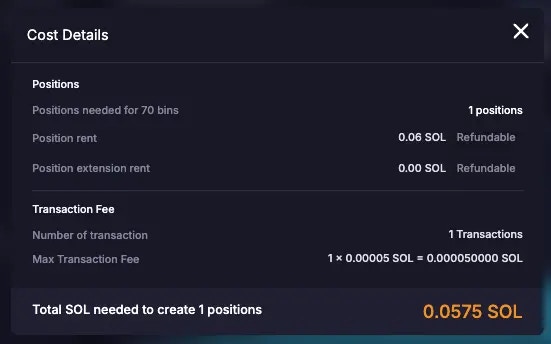
After you’ve entered with the amount of liquidity you plan to deposit, selected your Volatility Strategy, and set the price range where your liquidity gets allocated, you can view the cost involved in opening that position and adding liquidity. When you create a DLMM position, you need to pay some rent. At a glance, Meteora shows you the SOL needed to create your liquidity position, and what portion of the SOL is refundable or non-refundable, when you close your position at a later stage. SOL required for the position creation rent and position extension rent has the “Refundable” label, while the SOL required for creating new bin arrays has the “Non-Refundable” label. In this example, when you close your own position, you are refunded ~0.2374752 SOL, which is the sum of the position rent needed to open your position and the position extension rent.
Confirm Add Liquidity
If the deposit details, Volatility Strategy, price range, and cost details are acceptable, you can proceed to click “Add Liquidity” to open your position!Your Positions
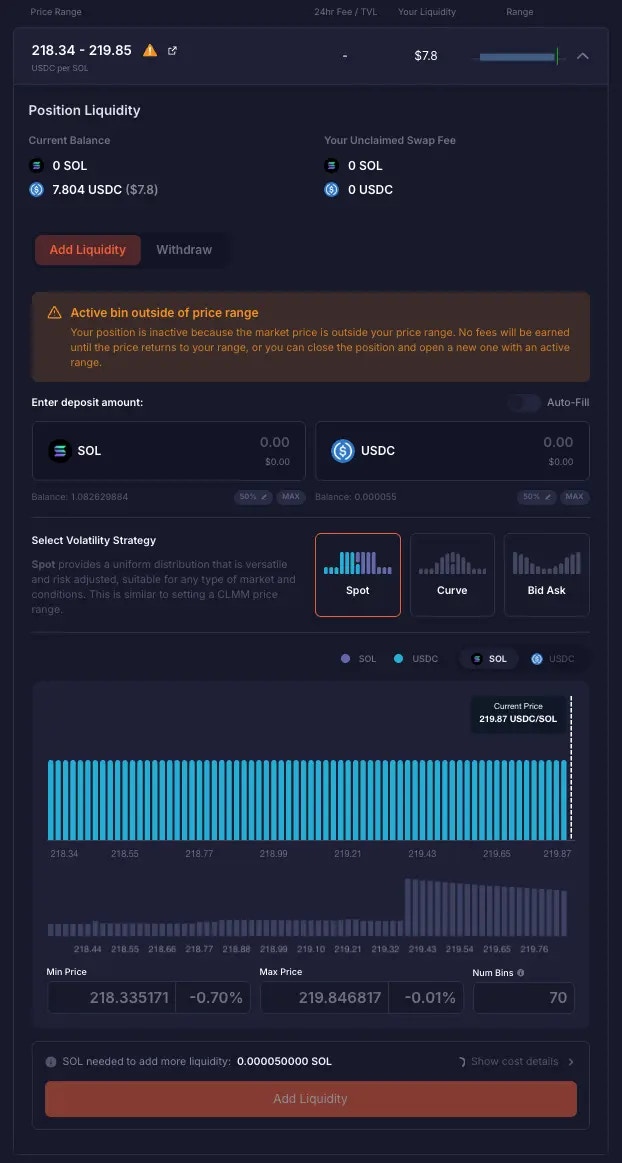
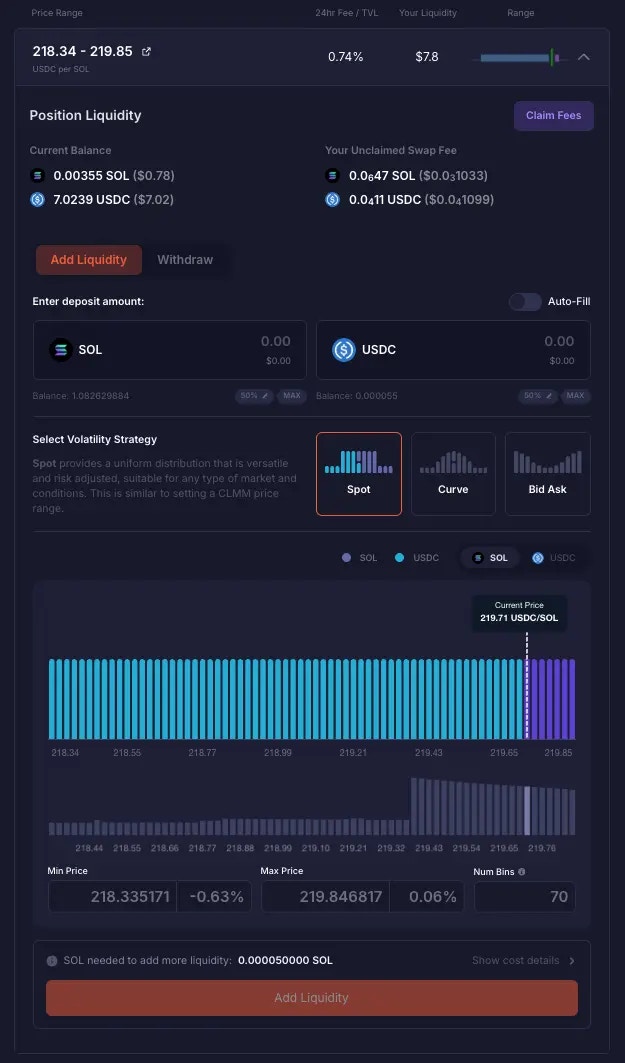
Once you have added liquidity and opened a liquidity position in a pool, you can track that new position under the “Your Positions” tab. You are provided with a graphical representation of your price range, to quickly see if your position is active or out of range.Out of range position
In range position
You do not get an LP token or NFT that represents your position. You just have a unique DLMM position program account, and you cannot transfer this liquidity position to another wallet address.
Earning fees in your position
LPs earn fees as long as successful swaps happen within their active price range in the pool. This could be swaps within the same active bin or swaps that resulted in closed bin(s) and a new active bin and price. But there can only be one active bin at any point in time. On DLMM, fees do not auto-compound back to the pool. Fees you earn accumulate under “Your Unclaimed Swap Fee” and you’d have to claim them manually.What happens when your position goes “Out of Range”?
The tokens you deposit into the DLMM pool are used as liquidity for traders to swap and in return you earn fees. As swaps take place, the active price changes and the token amounts in your position would fluctuate. If the current active price moves outside of the price range you initially set, your position becomes inactive and you stop earning fees. In such a scenario, your position would be left with only one type of token in the pair, because 100% of the other token would have been sold in exchange for your remaining token. In this example, SOL (purple bins) in the position were all sold to USDC (blue bins). You cannot change your price range for your position once created. You can either:- Wait for the price to return within your range, especially if it is not too far out
- Or if you want to continue earning fees immediately, rebalance by withdrawing your liquidity and opening a new position with a new price range / use additional funds to open a new position with a new price range
How to Withdraw Liquidity
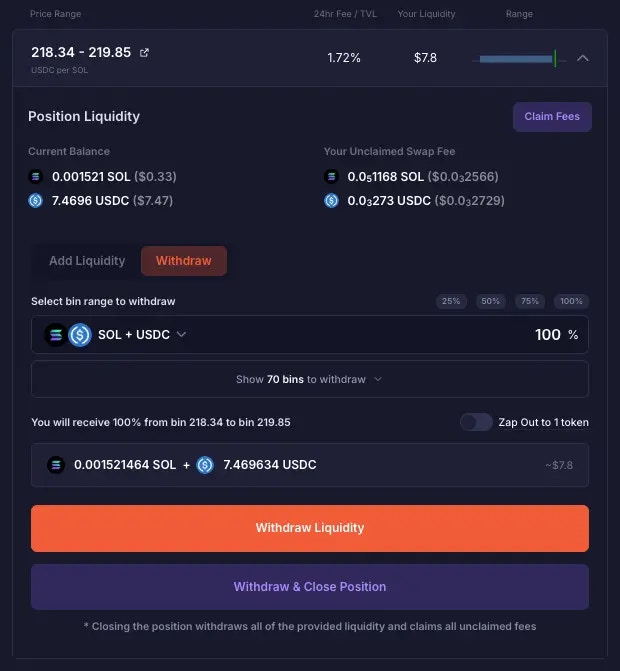
Under “Your Positions”, choose the liquidity position you wish to withdraw from. Once selected, navigate to the Withdraw tab.