Learn how to create a Meteora DLMM launch pool with configurable price bins, dynamic fees, activation controls, optional Alpha Vault, liquidity seeding, and limit orders.
This guide walks you through the steps to create a DLMM launch pool on Meteora. Whether you’re a seasoned developer or just starting out, this guide has got you covered to deploy liquidity and launch your project on Meteora.
By the end of this quicklaunch, you’ll have built a liquidity pool on Meteora by:
Configuring your liquidity pool settings
Interacting with our DLMM program
Seeing your liquidity pool in action on Meteora
Why Meteora?Meteora is a hyper optimized liquidity layer that ensures that your project’s provided liquidity is secure, sustainable and composable for anyone to trade on. By following this guide, you’ll be able to launch a concentrated liquidity pool with dynamic fees on Meteora in just a few quick and easy steps.
Meteora Invent is a toolkit consisting of everything you need to invent innovative token launches on Meteora. Run the following command in your terminal to get started.
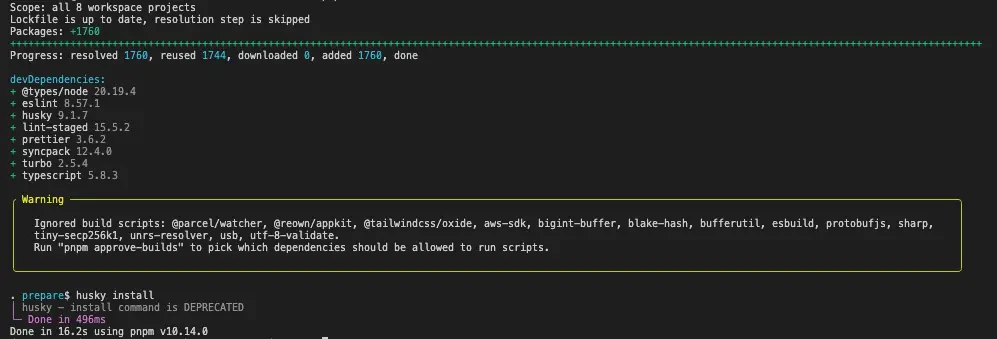
Once you’ve cloned the repository, you’ll have a new project directory with a meteora-invent folder. Run the following to install pnpm and the project dependencies.
Terminal
cd meteora-inventpnpm install
2
Optional: Start a Local Test Validator
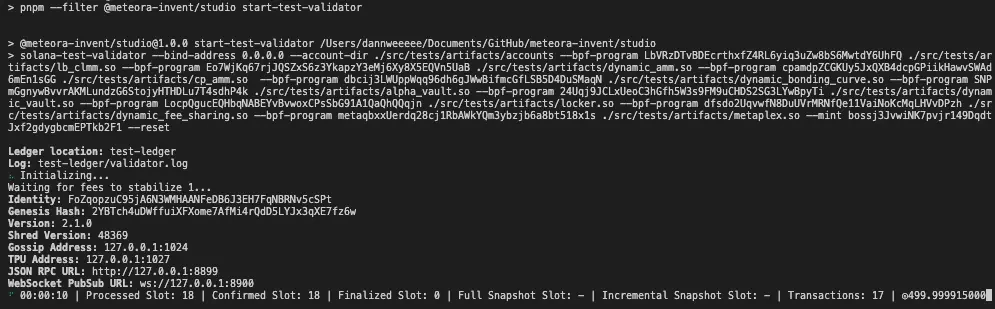
In Meteora Invent we provide an optional command for you to run a local validator to test your pool before deploying it to devnet or mainnet. Run the following command in your code editor terminal to get started.
Terminal
pnpm studio start-test-validator
This will start a local validator on your machine which will be hosted on http://localhost:8899.
3
Setup Environment Variables
We provide an easy way to setup environment variables when getting started. Run the following command in your code editor terminal to get started.
Terminal
cp studio/.env.example studio/.env
This will copy the example environment variables file to your .env file. Configure the following variables:
PRIVATE_KEY - Your private key for the wallet you will be using to deploy the pool.
Thereafter, you will need to run this command to generate a keypair from your wallet private key.
Terminal
pnpm studio generate-keypair# For devnet (airdrops 5 SOL)pnpm studio generate-keypair --network devnet --airdrop# For localnet (airdrops 5 SOL)# Ensure that you have already started the local validator with pnpm start-test-validatorpnpm studio generate-keypair --network localnet --airdrop
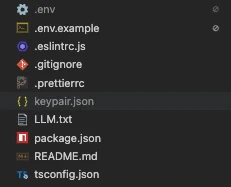
This will generate a keypair.json file in the studio directory which will be used for all actions in this guide.
4
Configure your DLMM Pool
Navigate to the studio/config/dlmm_config.jsonc file and configure your DLMM pool settings.
Set your DLMM configuration
You can configure everything DLMM pool related in this file.
The comments in the file are to help you understand the different settings you can configure. Please ensure that you read through the comments while configuring your pool.
dlmm_config.jsonc
 {
   /* rpcUrl is required. You can switch between mainnet, devnet and localnet or use your own RPC URL. */
   "rpcUrl": "https://api.devnet.solana.com", // mainnet: https://api.mainnet-beta.solana.com | devnet: https://api.devnet.solana.com | localnet: http://localhost:8899

   /* dryRun is required. If true, transactions will be simulated and not executed. If false, transactions will be executed. */
   "dryRun": true, // Set to false only after you understand what will happen

   /* keypairFilePath is required and will be the payer + signer for all transactions */
   "keypairFilePath": "./keypair.json",

   /* computeUnitPriceMicroLamports is required and can be adjusted to fit your needs */
   "computeUnitPriceMicroLamports": 100000,

   /* quoteMint is required for the following actions:
   * 1. dlmm-create-pool
   * 2. dlmm-seed-liquidity-lfg
   * 3. dlmm-seed-liquidity-single-bin
   * 4. dlmm-set-pool-status
   * SOL: So11111111111111111111111111111111111111112 | USDC: EPjFWdd5AufqSSqeM2qN1xzybapC8G4wEGGkZwyTDt1v | any other token address
   */
   "quoteMint": "So11111111111111111111111111111111111111112",

   /* If you have a baseMint already created, you can specify it in the cli command via --baseMint flag. If you don't have a baseMint, you can create a new one using createBaseToken.
   * Either use --baseMint flag or createBaseToken, but not both.
   */
   "createBaseToken": {
     "supply": 1000000000, // total amount of base token to be minted
     "decimals": 6, // decimals of the base token
     // "tokenMintKeypairFilePath": "./mint-keypair.json", // path to token mint keypair if you have a specific keypair for the token mint. If not provided, a new keypair will be generated.
     "name": "YOUR_TOKEN_NAME", // token name
     "symbol": "YOUR_TOKEN_SYMBOL", // token symbol
     "authorities": {
       "mint": "YOUR_MINT_AUTHORITY_ADDRESS", // token mint authority address. <PublicKey | null>
       "freeze": "YOUR_FREEZE_AUTHORITY_ADDRESS", // token freeze authority address. <PublicKey | null>
       "update": "YOUR_UPDATE_AUTHORITY_ADDRESS" // token update authority address. <PublicKey | null>
     },
     /* Optional Metaplex Token Metadata Properties
     * Read more about the properties here: https://developers.metaplex.com/token-metadata
     */
     "sellerFeeBasisPoints": 0, // Royalty fee in basis points (0-10000)
     "creators": null, // Array of creator objects of the token (optional)
     "collection": null, // Collection info (optional)
     "uses": null, // Usage restrictions (optional)
     "metadata": {
       // "uri": "https://gateway.irys.xyz/123456789", // if you already have a metadata URI created, you can specify it here

       /* Only use the following parameters for createBaseToken if you don't have an existing metadata uri
       * This will create an image uri and a new metadata uri and upload everything to Irys
       */
       "image": "./data/image/test-token.jpg", // this can be a URL of the image address (e.g. https://example.com/token-image.png) or the image file path (e.g. ./data/image/test-token.jpg)
       "description": "YOUR_TOKEN_DESCRIPTION", // token description
       "website": "https://example.com", // project website
       "twitter": "https://x.com/yourproject", // twitter URL
       "telegram": "https://t.me/yourproject" // telegram URL
     }
   },

   /* dlmmConfig is only used in the following actions:
   * 1. dlmm-create-pool
   */
   "dlmmConfig": {
     "binStep": 25, // Price increment/decrement percentage in basis points (400 = 4% price step between bins)
     "feeBps": 1, // Trading fee in basis points (200 = 2% fee per swap)
     "initialPrice": 1.333, // Initial price(in terms of quote/base price)
     "activationType": 1, // 0 - Slot | 1 - Timestamp
     "activationPoint": null, // Activation time of the pool depending on activationType (Calculate in slots if activationType is 0 (slots) | Calculate in seconds if activationType is 1 (timestamp))
     "priceRounding": "up", // Price calculation rounding direction for bin ID conversion
     "creatorPoolOnOffControl": true, // Pool creator permission to enable/disable trading for permissionless pools
     "hasAlphaVault": false // If true, the alpha vault will be created after the pool is created
     // "concreteFunctionType": 0, // 0 - LimitOrder | 1 - LiquidityMining (defaults to 0, only pools created with 0 accept limit orders)
     // "collectFeeMode": 0 // 0 - InputOnly | 1 - OnlyY (defaults to 0)
   },

   /* lfgSeedLiquidity is only used in the following actions:
   * 1. dlmm-seed-liquidity-lfg
   * https://ilm.jup.ag/
   */
   "lfgSeedLiquidity": {
     "minPrice": 0.003393, // Minimum price boundary for liquidity distribution range
     "maxPrice": 0.004393, // Maximum price boundary for liquidity distribution range
     "curvature": 0.6, // Distribution curvature factor (1/k) controlling liquidity concentration (0-1, lower = more concentrated)
     "seedAmount": "200000", // Total amount of liquidity to seed into the pool (in token units)
     "operatorKeypairFilepath": "./keypair.json", // File path to operator's private key for signing seeding transactions
     "positionOwner": "YOUR_POSITION_OWNER_ADDRESS", // Public key of the position owner who controls the liquidity
     "feeOwner": "YOUR_FEE_OWNER_ADDRESS", // Public key entitled to claim trading fees from this position
     "lockReleasePoint": 0, // Timestamp/slot when position becomes withdrawable (0 = immediately unlocked)
     "seedTokenXToPositionOwner": true // Whether to send 1 lamport of token X to position owner as ownership proof
   },

   /* singleBinSeedLiquidity is only used in the following actions:
   * 1. dlmm-seed-liquidity-single-bin
   */
   "singleBinSeedLiquidity": {
     "price": 1.333, // Exact price where liquidity will be concentrated in a single bin
     "priceRounding": "up", // Price calculation rounding direction for bin ID conversion. "up" = round up, "down" = round down
     "seedAmount": "750000000", // Amount of token X (base token) to seed into the single bin (in token units)
     "operatorKeypairFilepath": "./keypair.json", // File path to operator's private key for signing seeding transactions
     "positionOwner": "YOUR_POSITION_OWNER_ADDRESS", // Public key of the position owner who controls the liquidity
     "feeOwner": "YOUR_FEE_OWNER_ADDRESS", // Public key entitled to claim trading fees from this position
     "lockReleasePoint": 0, // Timestamp/slot when position becomes withdrawable (0 = immediately unlocked)
     "seedTokenXToPositionOwner": true // Whether to send 1 lamport of token X to position owner as ownership proof
   },

   /* setDlmmPoolStatus is only used in the following actions:
   * 1. dlmm-set-pool-status
   */
   "setDlmmPoolStatus": {
     "enabled": true // true = enable trading | false = disable trading
   },

   /* placeLimitOrder is only used in the following actions:
   * 1. dlmm-place-limit-order (requires --poolAddress flag)
   * The pool must have been created with the limit order function type (concreteFunctionType: 0).
   * A limit order deposits into one or more bins (max 50) and fills as the market price crosses them.
   */
   "placeLimitOrder": {
     "side": "bid", // "ask" = sell the base token above the active bin | "bid" = buy with the quote token below the active bin
     "bins": [
       {
         "price": 1.2, // price (in terms of quote/base price) for this portion of the order
         "amount": 100 // amount in token units: base token amount for "ask" orders, quote token amount for "bid" orders
       }
     ]
   },

   /* cancelLimitOrder is only used in the following actions:
   * 1. dlmm-cancel-limit-order (requires --poolAddress flag, optional --limitOrder flag)
   * Cancelling withdraws unfilled deposits, filled proceeds and earned fees, then closes the order account.
   */
   "cancelLimitOrder": {
     "cancelAll": false // when true and no --limitOrder flag is passed, cancels every open order on the pool
   },

   /* alphaVault is only used in the following actions:
   * 1. dlmm-create-pool
   * There are 2 types of alpha vault: First Come First Serve (FCFS) and Prorata.
   */
   "alphaVault": {
     "poolType": "dlmm", // DLMM = dlmm | DAMM v1 = dynamic | DAMM v2 = damm2
     "alphaVaultType": "fcfs", // FCFS = fcfs | Prorata = prorata

     /* Only use the following parameters for alphaVaultType: fcfs
     * 1. maxDepositCap
     * 2. individualDepositingCap
     */
     "maxDepositCap": 10000, // Maximum total amount (in quote token) that can be deposited across all users in the vault
     "individualDepositingCap": 1, // Maximum amount (in quote token) that each individual user can deposit

     /* Only use the following parameters for alphaVaultType: prorata
     * 1. maxBuyingCap
     */
     // "maxBuyingCap": 10000, // Maximum total amount (in quote token) that can be bought across all users in the vault

     "depositingPoint": 1755421200, // When users can start depositing depending on pool's activationType (Calculate in slots if activationType is 0 (slots) | Calculate in seconds if activationType is 1 (timestamp))
     "startVestingPoint": 1755507600, // When token vesting begins and users can start claiming their vested tokens depending on pool's activationType (Calculate in slots if activationType is 0 (slots) | Calculate in seconds if activationType is 1 (timestamp))
     "endVestingPoint": 1755507600, // When token vesting ends and all tokens become fully claimable depending on pool's activationType (Calculate in slots if activationType is 0 (slots) | Calculate in seconds if activationType is 1 (timestamp))
     "escrowFee": 0, // Fee amount (in quote token) charged when creating a stake escrow account
     "whitelistMode": "permissionless" // Whitelist mode: permissionless | permissioned_with_merkle_proof | permissioned_with_authority

     /* Optional Configuration: whitelistFilePath
     * Only use when whitelistMode is permissioned_with_merkle_proof or permissioned_with_authority
     */
     // "whitelistFilepath": "./data/whitelist_wallet.csv", // Optional path to CSV file containing whitelisted wallet addresses and their deposit caps (format: wallet,deposit_cap)

     /* Optional Configuration: merkleProofBaseUrl, chunkSize, kvProofFilepath, cloudflareKvProofUpload
     * Only use when whitelistMode is permissioned_with_merkle_proof
     */
     // "merkleProofBaseUrl": "https://example.workers.dev/", // Base URL endpoint where merkle proofs are stored and can be retrieved for whitelisted wallet verification
     // "chunkSize": 1000, // Optional batch size for processing large whitelist files or merkle tree operations to avoid memory/performance issues
     // "kvProofFilepath": "./data/kv_proofs", // Optional path to key-value file storing pre-computed merkle proofs for whitelisted addresses
     // "cloudflareKvProofUpload": {
     //   "kvNamespaceId": "YOUR_KV_NAMESPACE_ID",
     //   "accountId": "YOUR_ACCOUNT_ID",
     //   "apiKey": "YOUR_API_KEY"
     // }
   }
 }
The toolkit contains logic to make it easier for you to create the DLMM pool such as:
Minting a new baseMint token or parsing in an existing baseMint token.
Launching the DLMM pool immediately or at a certain activationPoint (in slots or timestamp depending on the activationType).
Optional creation of an Alpha Vault with your DLMM launch pool.
5
Create your DLMM Pool
After configuring your DLMM pool settings in dlmm_config.jsonc, you can now create your pool by running the following command.If you don’t have a base mint, you can configure createBaseToken in the config file and run the
following command.
pnpm studio dlmm-create-pool
If you already have a base mint created, you can provide it via the CLI with a --baseMint flag
and run the following command.
pnpm studio dlmm-create-pool --baseMint <YOUR_BASE_MINT_ADDRESS>
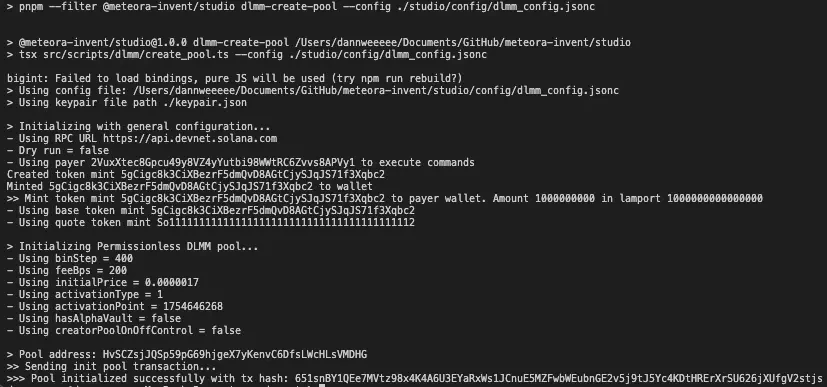
This will create your pool and print the pool address and other relevant information to the console.
This example includes creating of baseMint token before creating the DLMM launch pool.
6
Seed your DLMM Pool
After creating your DLMM pool, you can now seed your pool with liquidity.
dlmm-seed-liquidity-lfg
dlmm-seed-liquidity-single-bin
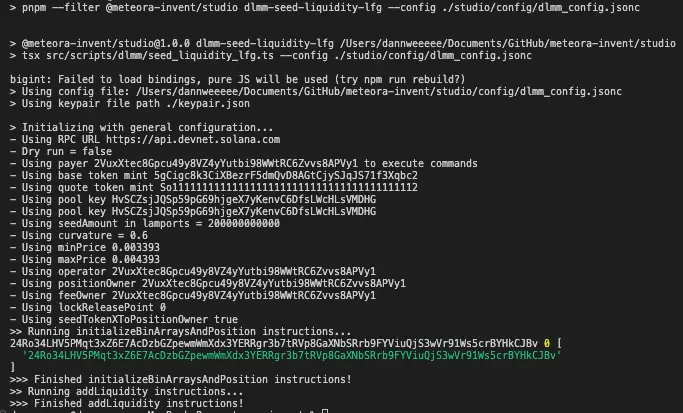
If you want to seed your pool with liquidity using the LFG model, you can run the following command.
Please take note that the dlmm-seed-liquidity-lfg command will only work when your DLMM launch pool is not activated yet. You can configure the pool activation time using the activationPoint parameter in the dlmm_config.jsonc file.
Terminal
pnpm studio dlmm-seed-liquidity-lfg --baseMint <YOUR_BASE_MINT_ADDRESS>
This will seed your DLMM pool with liquidity based on the curvature, minPrice and maxPrice parameters that you have set in the dlmm_config.jsonc file.
If you want to learn how the liquidity curvature works, you can head to https://ilm.jup.ag/ to learn more.
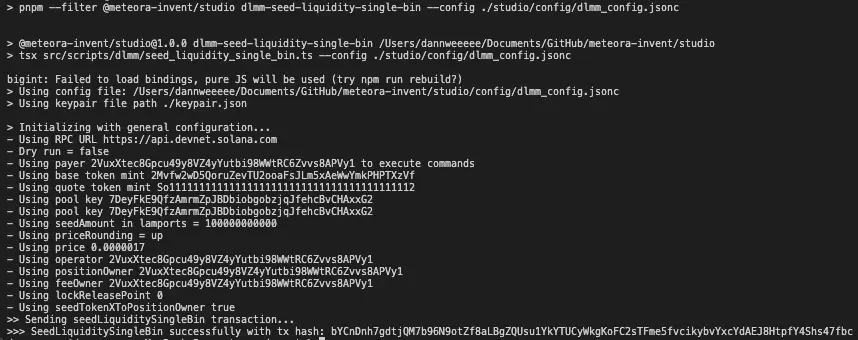
If you want to seed your pool with liquidity in a single bin, you can run the following command.
Please take note that the dlmm-seed-liquidity-single-bin command will only work when your DLMM launch pool is not activated yet. You can configure the pool activation time using the activationPoint parameter in the dlmm_config.jsonc file.
Terminal
pnpm studio dlmm-seed-liquidity-single-bin --baseMint <YOUR_BASE_MINT_ADDRESS>
This will seed your DLMM pool with liquidity in a single bin based on the price and seedAmount parameters that you have set in the dlmm_config.jsonc file.
7
Place Limit Orders on your DLMM Pool (Optional)
DLMM pools created with the limit order function type (concreteFunctionType: 0, the default) support onchain limit orders. A limit order deposits tokens into one or more bins and fills automatically as the market price crosses them.
To learn how DLMM limit orders work under the hood, head to DLMM Limit Order.
After configuring the placeLimitOrder settings in dlmm_config.jsonc, place an order with the following command.
pnpm studio dlmm-place-limit-order --poolAddress <YOUR_POOL_ADDRESS>
This will place the order and print the limit order address to the console. Save the address if you want to cancel a specific order later.To inspect your open orders — per-bin fill status, fees earned, and withdrawable amounts — run the following command.
pnpm studio dlmm-get-limit-orders --poolAddress <YOUR_POOL_ADDRESS>
To cancel an order and withdraw unfilled deposits, filled proceeds, and earned fees, run the following command.
pnpm studio dlmm-cancel-limit-order --poolAddress <YOUR_POOL_ADDRESS> --limitOrder <YOUR_LIMIT_ORDER_ADDRESS>
Omit the --limitOrder flag and set cancelLimitOrder.cancelAll to true in dlmm_config.jsonc to cancel every open order on the pool in one run.
Voilà! You’ve successfully created your DLMM pool on Meteora. You can now see your pool in action on Meteora either on Meteora’s mainnet or devnet app.
Was this page helpful?
Assistant
Responses are generated using AI and may contain mistakes.