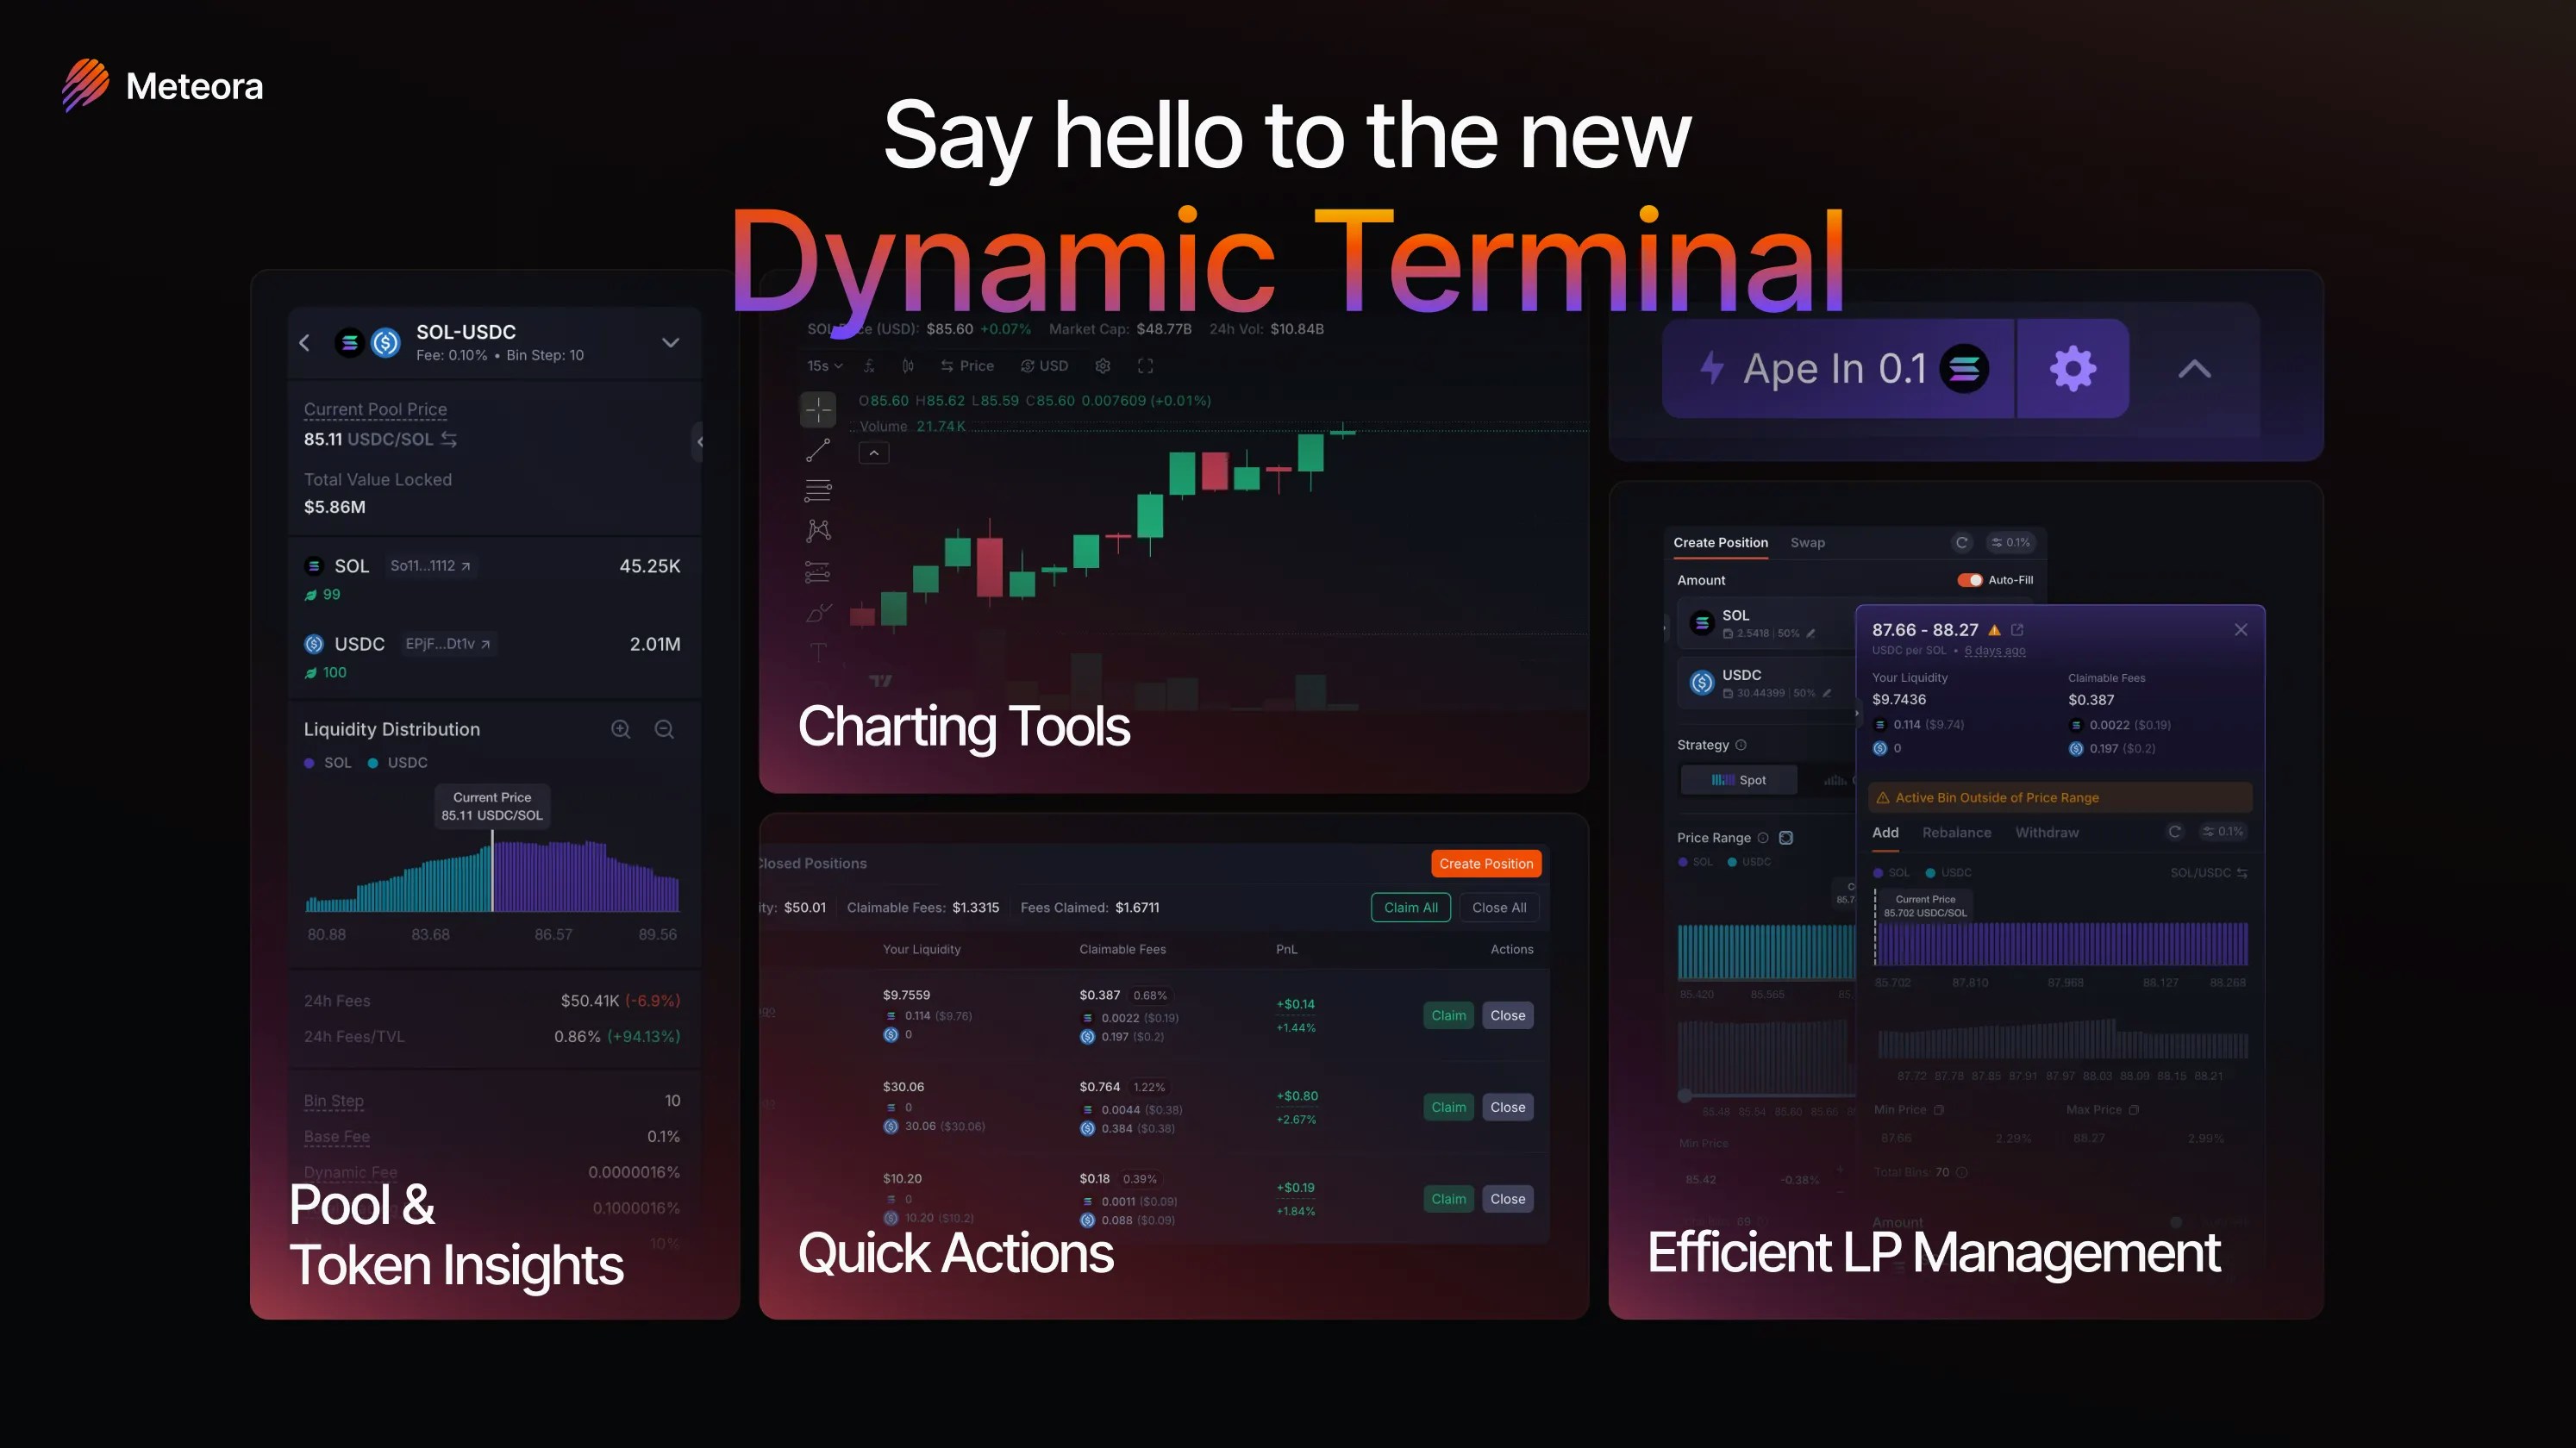
Meteora’s Dynamic Terminal is the revamped DLMM pool interface, purpose-built to give liquidity providers everything they need in one place. It combines advanced charting, deep pool and token data, position management, and quick actions into a single, high-performance workspace. Dynamic Terminal for DLMM is live on meteora.ag. DAMM v2 support is coming soon.Documentation Index
Fetch the complete documentation index at: https://docs.meteora.ag/llms.txt
Use this file to discover all available pages before exploring further.
Layout Overview
The Dynamic Terminal is organized into four main areas:| Area | What’s There |
|---|---|
| Left panel | Pool stats, token info, and risk data |
| Center top | TradingView price chart |
| Center bottom | Your open positions with real-time P&L |
| Right panel | Position creation and management controls |
1. Pool and Token Insights Panel (Left)
The left panel consolidates everything you need to evaluate a pool before committing capital. Pool statistics:- Base Fee, Bin Step, Dynamic Fee
- TVL and token ratio
- Liquidity distribution chart
- 24h Volume, Fees, and Fees/TVL
- Token contract address and Jupiter Organic Score
- Links to Solscan, RugCheck, and Bubblemaps
- Token Age, Market Cap, FDV, Holders
- % of supply held by Top 10 Holders and Top 10 Dev Wallets
- Freeze Authority and Mint Authority status
- Total Supply
- Price change % in 5m / 1h / 12h / 24h
- Historical fee performance
- Links to popular LP community tools
Pool Stats Explained
- Bin Step — the price difference between consecutive bins. Smaller = more continuous price range; larger = higher fee options with wider price jumps. Use smaller steps for stable pairs, larger for volatile ones.
- Base Fee — minimum trading fees earned when swaps occur through your position
- Dynamic Fee — includes Base Fee, surges in response to real-time price volatility
- Max Fee — maximum trading fees earned on swaps
- Protocol Fee — portion of fees charged per trade that goes to the protocol (typically 5% of Dynamic Fee for standard DLMM pools)
- 24h Fee / TVL % — ratio of fees collected in the past 24h divided by current TVL, expressed as a percentage
2. Professional-Grade TradingView Price Chart
The Dynamic Terminal features a fully integrated TradingView price chart — the same charting platform used by professional traders worldwide.- Technical indicators — apply moving averages, RSI, Bollinger Bands, volume profiles, and more
- Drawing tools — mark support and resistance levels, trend lines, and price targets
- Multiple timeframes — from 1-minute candles to weekly for macro context
- Persistent layout — your chart settings and annotations are saved automatically
- Collapsible — hide the chart entirely when you don’t need it, bring it back in one click
- Set tighter, more strategic ranges — anchor your min/max price to key technical levels
- Time your entries — enter when price is consolidating near your target range
- Adjust with confidence — use chart context to decide whether to rebalance, hold, or exit
- Reduce impermanent loss — understand volatility before committing capital to a range
3. Current Pool Price and Sync
You can view the Current Pool Price at the top of the position creation panel. The pool price may not always match the general market price — especially for newly created pools with low liquidity.Meteora uses Jupiter’s price API as a market price reference. Before adding liquidity, compare the pool price with other markets to confirm it’s in sync.
Sync with Jupiter’s Price
If the pool price is out of sync, use the “Sync with Jupiter’s price” button before depositing. This is available for pools where:- There is 0 liquidity between the active bin and the Jupiter price bin, or
- The liquidity is in a bin close enough to the Jupiter price bin
4. How to Add Liquidity
Create Position
Click the Create Position button on the right panel to open a concentrated liquidity position.Enter Deposit Amount
Enter the amount of Base Token or Quote Token you’d like to deposit. With Auto-Fill enabled (default), entering an amount for either token automatically fills the approximate equivalent for the other based on the current exchange rate. Use the Max button to enter your full balance, or the custom % button to enter a set proportion.Set Liquidity Slippage
Adjust how much price movement you’re willing to accept while adding liquidity. Increase slippage if transactions are failing due to price movement.Choose a Volatility Strategy
- Spot — uniform distribution across the range. Versatile and risk-adjusted, suitable for any market condition. Good default if unsure.
- Curve — concentrated around the current active price, less toward the edges. Best for stable pairs or low-volatility tokens.
- Bid-Ask — inverse of Curve; more liquidity at the edges of your range. Useful for volatile pairs or as a DCA in/out strategy (single-sided).
Set the Price Range
By default, your position spans 69 bins with the active price centered in your range. Adjust three ways:- Drag the slider — narrow the range (up to 69 bins)
- Enter Min/Max price directly — widen up to 1,400 bins
- Set Min % / Max % — define how far each boundary is from the active bin as a percentage; use the +/− per-bin buttons for fine-tuning
- Purple bins = Base token (e.g. SOL)
- Cyan blue bins = Quote token (e.g. USDC)
- Grey bins = Existing liquidity already in the pool. Hover over a bin for its price and token breakdown.
Single-Sided Liquidity
To deposit only one token, toggle off Auto-Fill and enter an amount in only one field. Example: You bought SOL at 236.6 USDC and want to gradually sell it at 240–280 USDC. Turn off Auto-Fill, enter only your SOL amount, set a range of 240–280, and use Bid-Ask strategy. Your SOL gets allocated across that range and progressively swaps to USDC as price moves through it.Cost Details
Before confirming, review the SOL rent required:- Refundable — position creation rent and extension rent, returned when you close the position
- Non-Refundable — SOL for creating new bin arrays
Confirm
When everything looks right, click Add Liquidity to execute.Ape In
The Ape In button lets you deploy liquidity fast — swap and create a position with a single token in one transaction, based on your preferred settings. Best for moving quickly on an opportunity.5. Your Positions (Bottom Panel)
All your open positions are listed at the bottom of the Dynamic Terminal with real-time performance data.| Metric | Description |
|---|---|
| Date & Time | When the position was opened |
| Your Liquidity | Current value of deposited tokens |
| Claimable Fees | Accumulated fees ready to claim |
| P&L | Profit & Loss in $ and % |
| 24h Fee / TVL % | Estimated short-term fee generation rate |
You do not receive an LP token or NFT for your position. Your position is a unique DLMM program account and cannot be transferred to another wallet.
Earning Fees
LPs earn fees whenever swaps occur within their active price range. Fees do not auto-compound — they accumulate and must be claimed manually.Out of Range
If the active price moves outside your range, your position goes inactive and stops earning fees. You can either:- Wait for price to return to your range
- Rebalance — withdraw and re-center your position around the current price
6. Quick Actions
Batch controls to manage all positions at once:- Claim All Fees — collect fees from every position in one transaction
- Close All Positions — exit all positions simultaneously
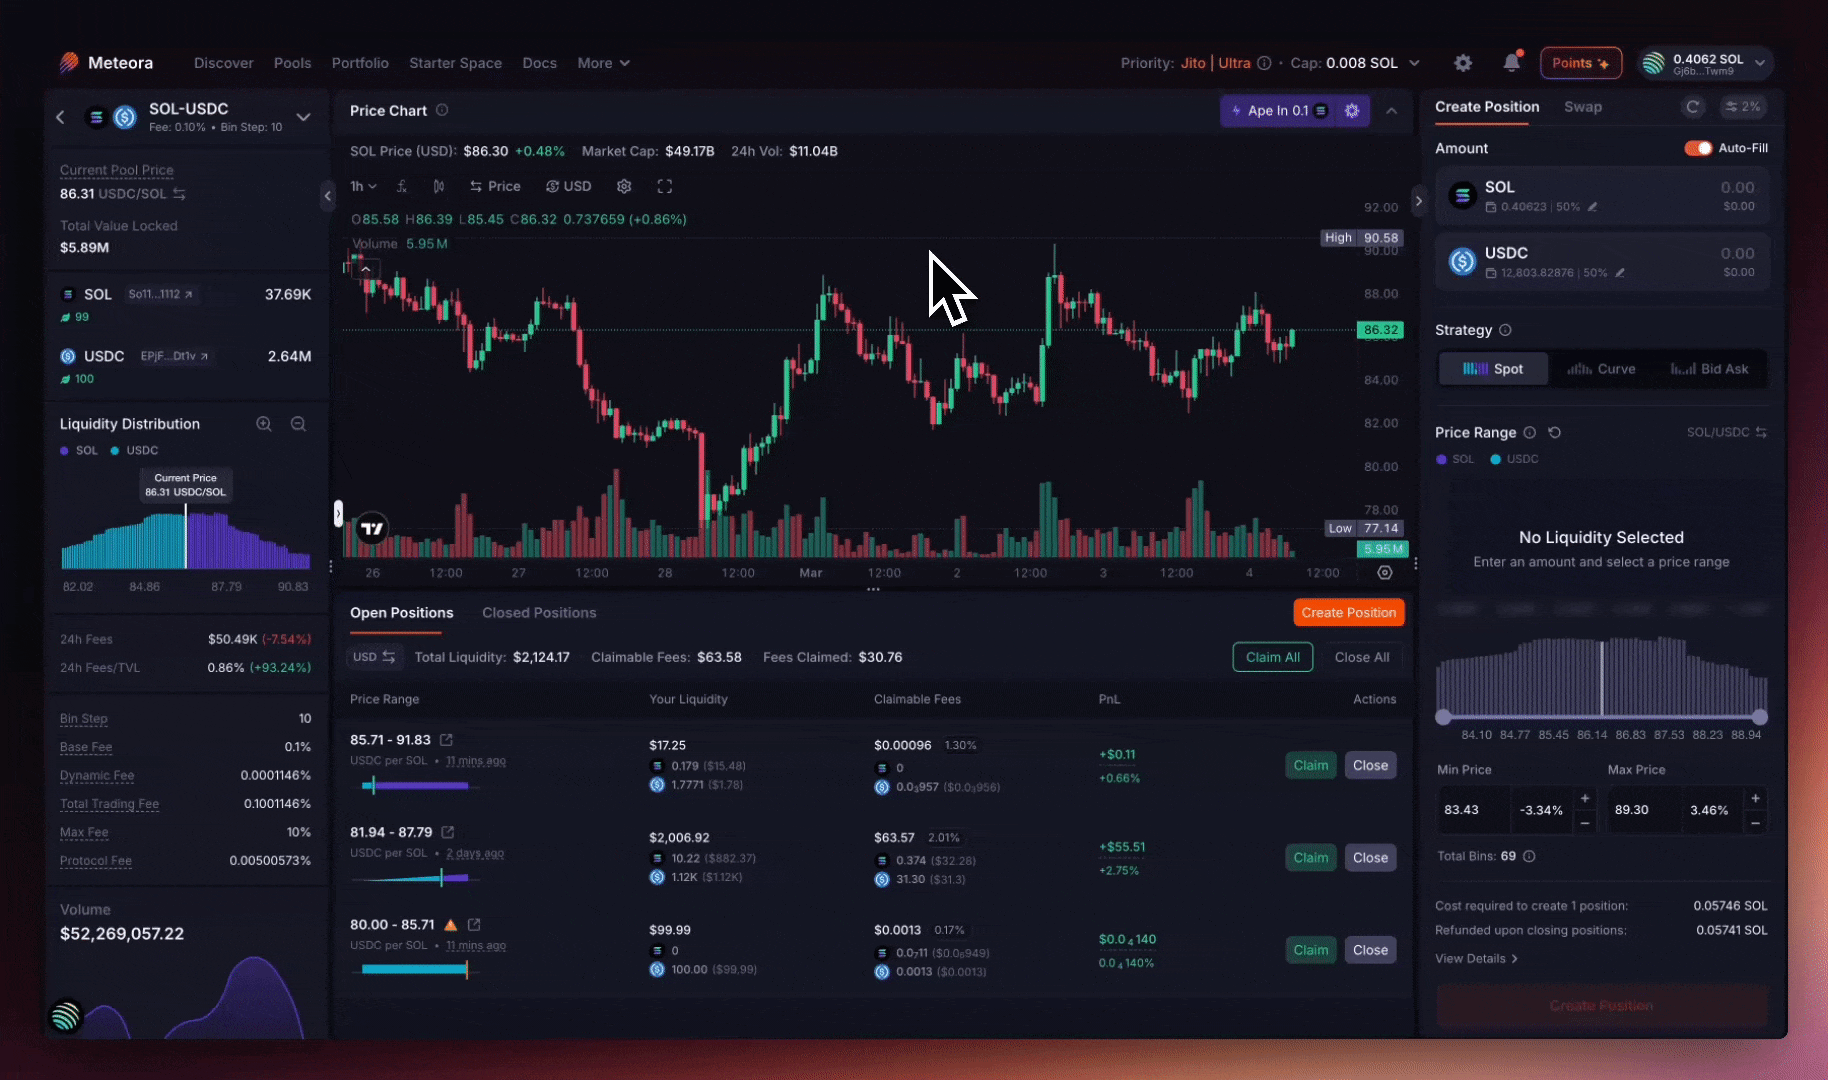
7. Position Management Panel (Right)
Select any position to open the dedicated management panel on the right side. Resizable and collapsible.- Add Liquidity — add more capital within the same price range
- Rebalance — one click to re-center your range around the current price
- Remove Liquidity — withdraw partial or full liquidity
- Withdraw and Close — exit the position entirely and reclaim rent
- Zap Out — withdraw and convert everything to your preferred token in one step (available for positions with ≤ 250 bins)
You cannot withdraw single-sided from the active bin — you must withdraw both tokens from the active bin.
8. Customizable Layout
Every LP has a different workflow. The Dynamic Terminal adapts:- Left panel — resize or hide the pool/token insights panel
- Right panel — resize or hide the position management panel
- Chart — resize or hide the TradingView price chart
Video Walkthrough
Watch Dann’s full walkthrough of the Dynamic Terminal: https://x.com/dannxbt/status/2029168965671661755Community Tools and Integrations
Analytics: Birdeye, GeckoTerminal, DEXScreener, DEXTools, and GMGN all have dedicated pool pages — links available directly from the pool page. Trading platforms: Axiom, Banana Gun, BONKbot, Fluxbot, Jupiter, MetaSolanaBot, Photon, and Trojan are all integrated. Note: for pools without SOL as the quote token, BONKbot, Photon, and Axiom may not appear. Community-built LP tools: lparmy.com/community-toolsLearn More
- LP Army Bootcamp — beginner-to-advanced strategies for DLMM LPing
- LP Army — join the community